
Logistics Training
This course provides a clear understanding of Logistics Standard Operating Procedures (SOPs). You will learn structured, step-by-step methods for handling key logistics operations such as receiving, inventory management, order fulfillment, shipping, and returns. The goal is to standardize processes, improve efficiency, reduce errors, and ensure compliance across the supply chain.

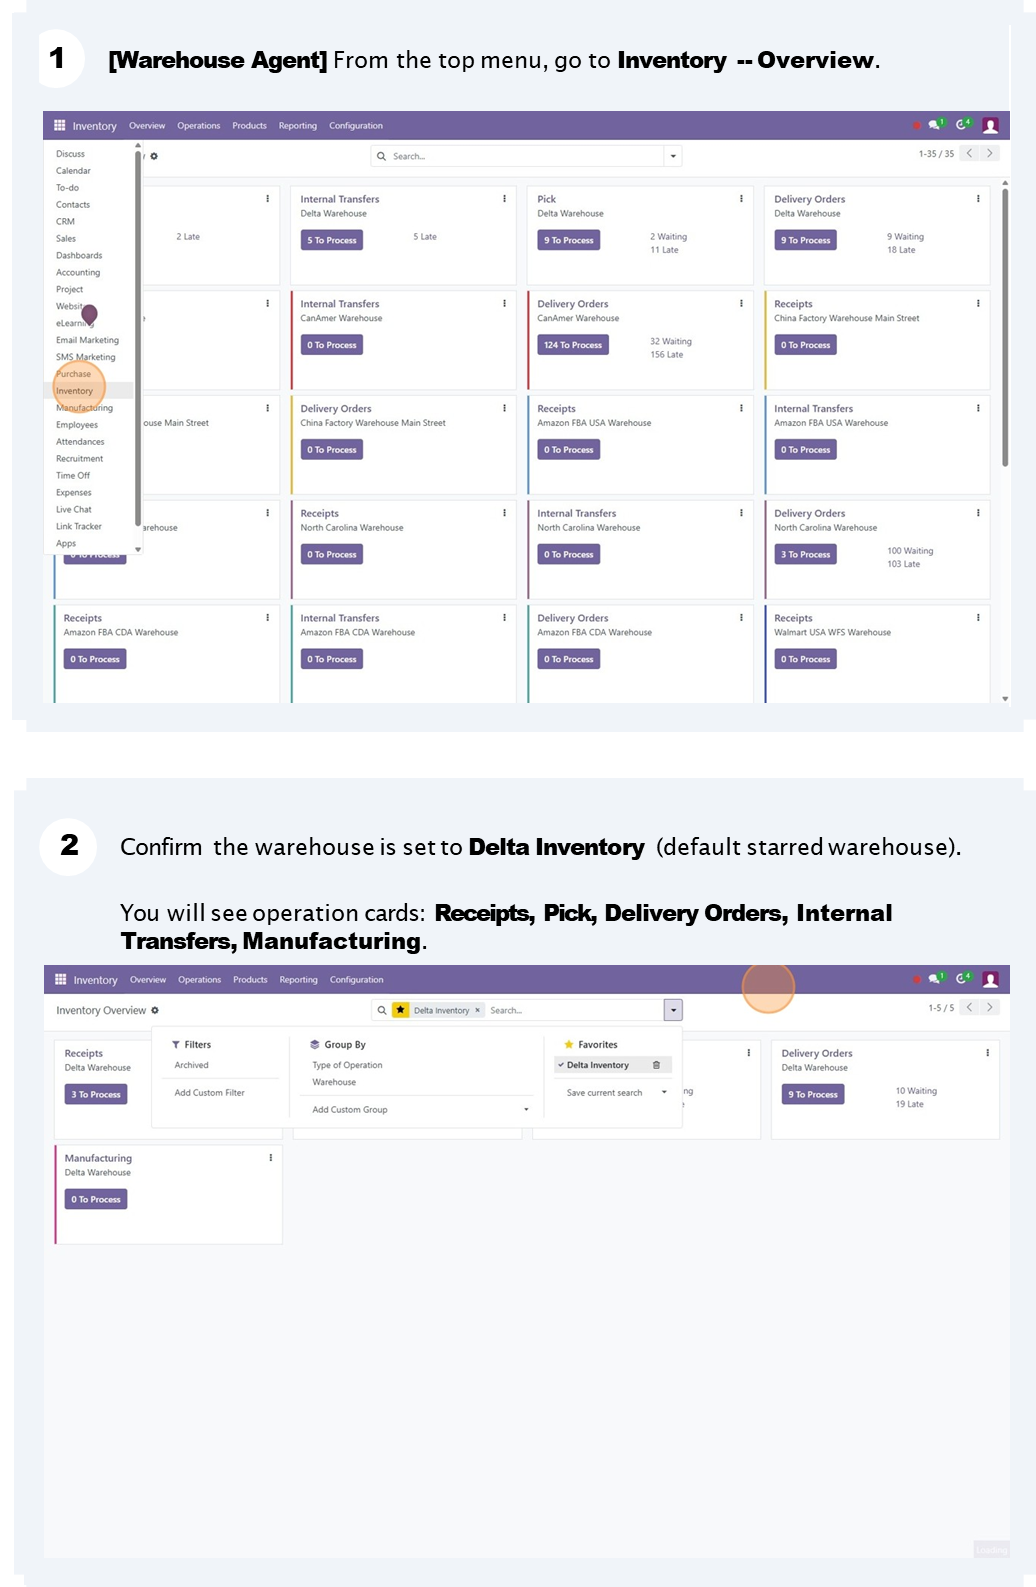
Delta Warehouse Workflow
Alert:
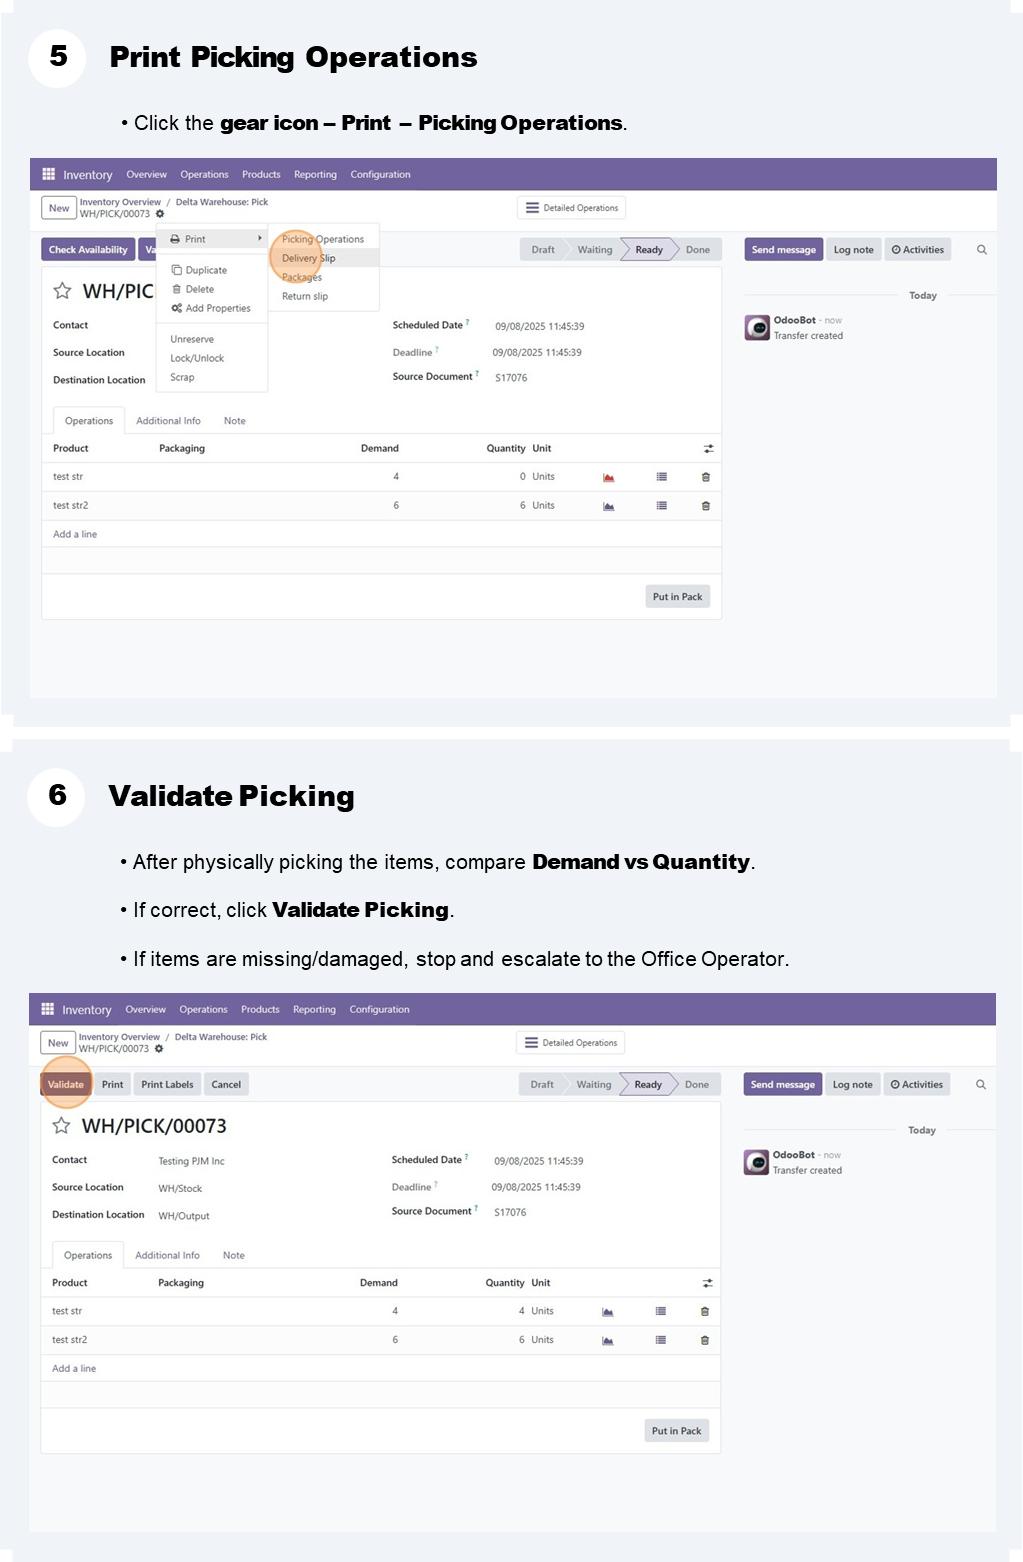
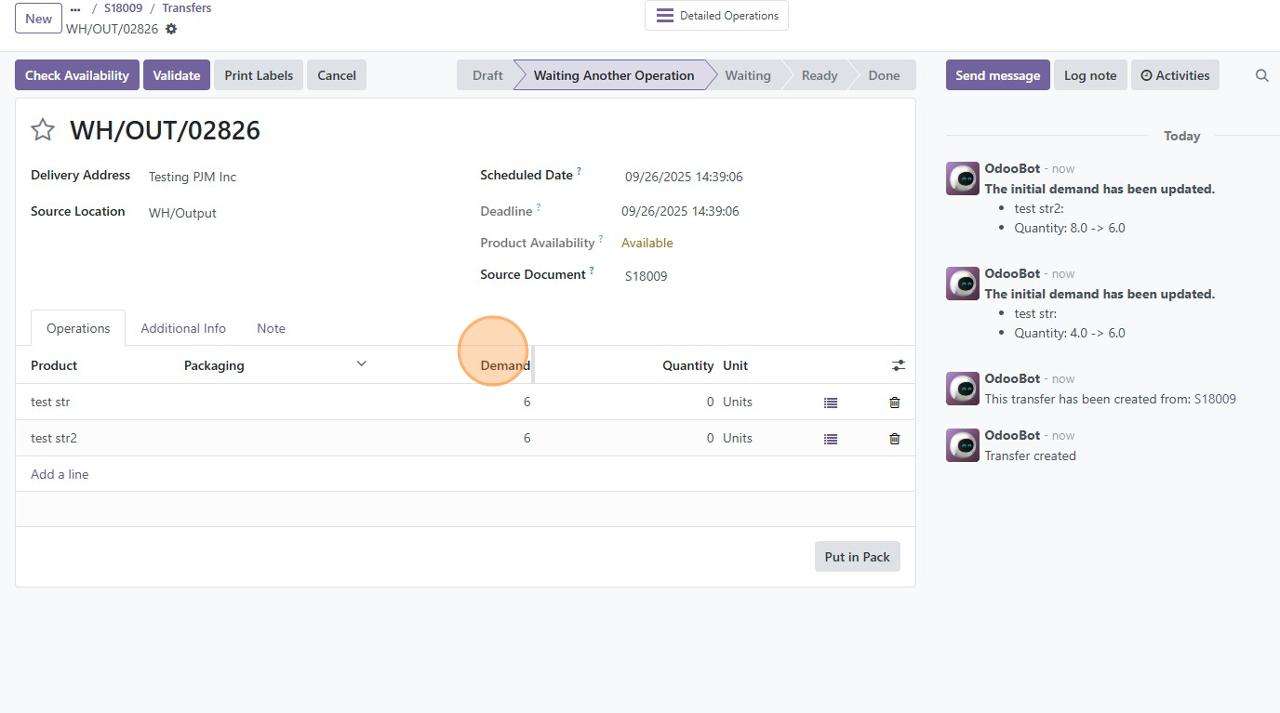
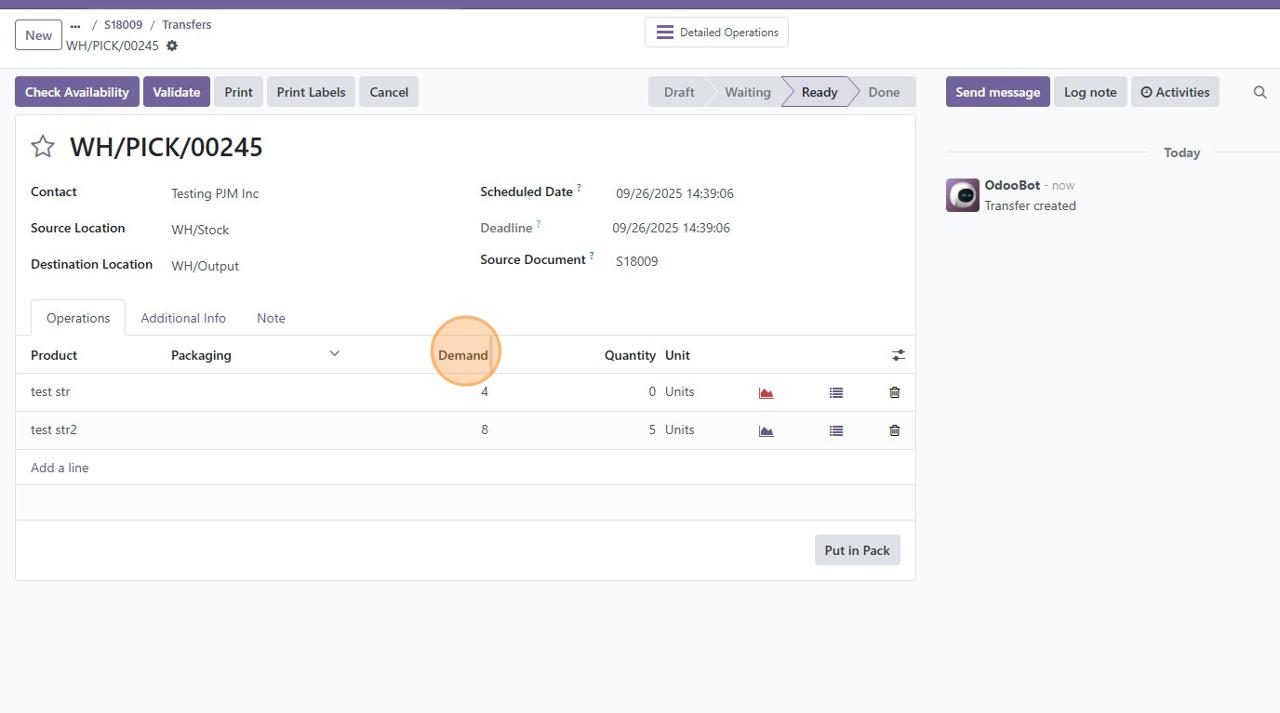
In Step 5, before printing, click Check Availability to ensure that Demand and Quantity match. Then, proceed to print Picking Operations.
(Items with a quantity of 0 will not be included in the Picking Operations printout.)
Alert:
In Step 5, before printing, click Check Availability to ensure that Demand and Quantity match. Then, proceed to print Picking Operations.
(Items with a quantity of 0 will not be included in the Picking Operations printout.)
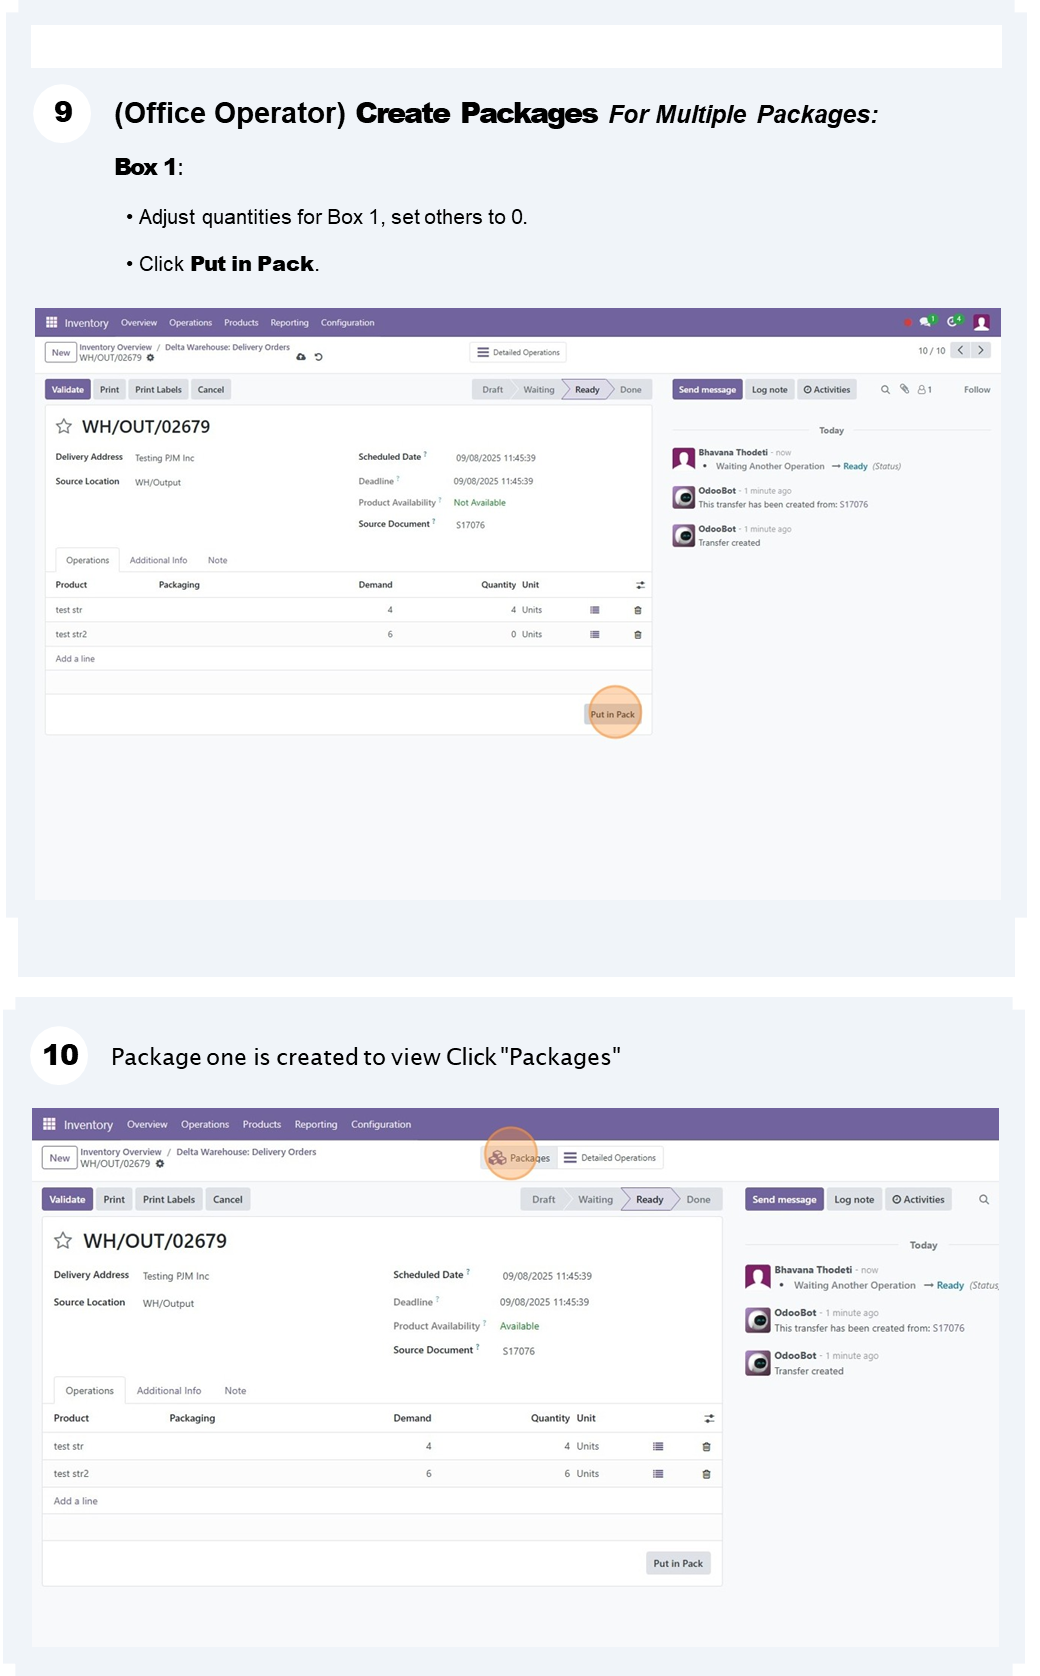
✅ Operator Goal: Handle cancellations at different stages.
1. Cancel SO Before Any Validation
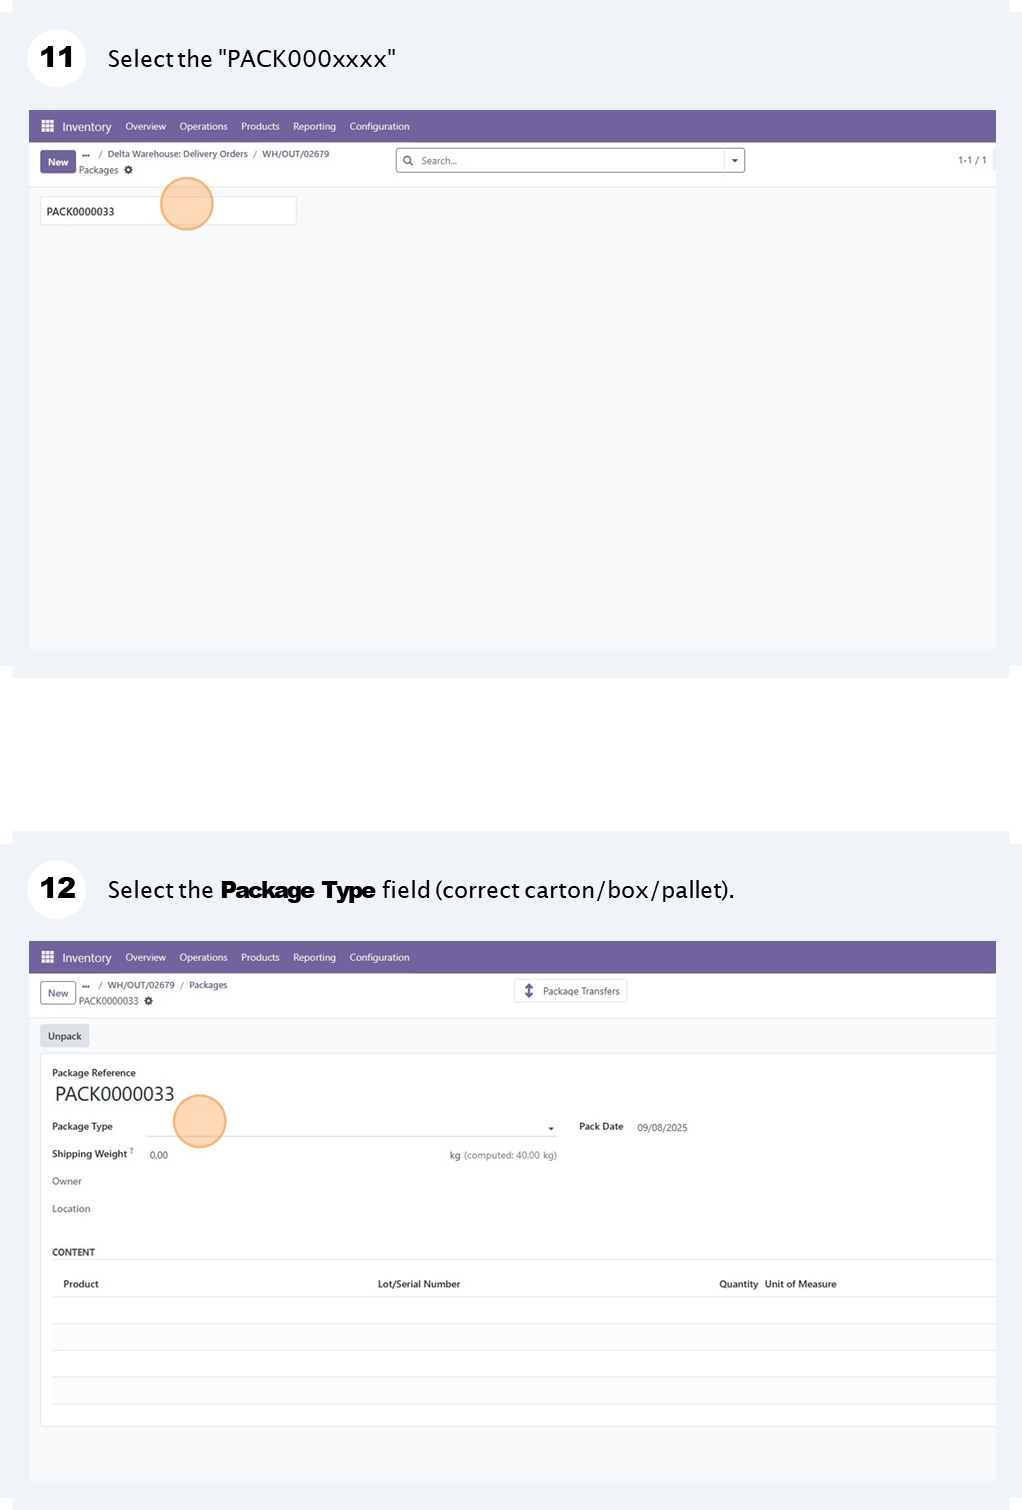
If neither PICK nor OUT is validated, cancelling the SO cancels everything automatically.
2. Cancel SO After PICK Validated
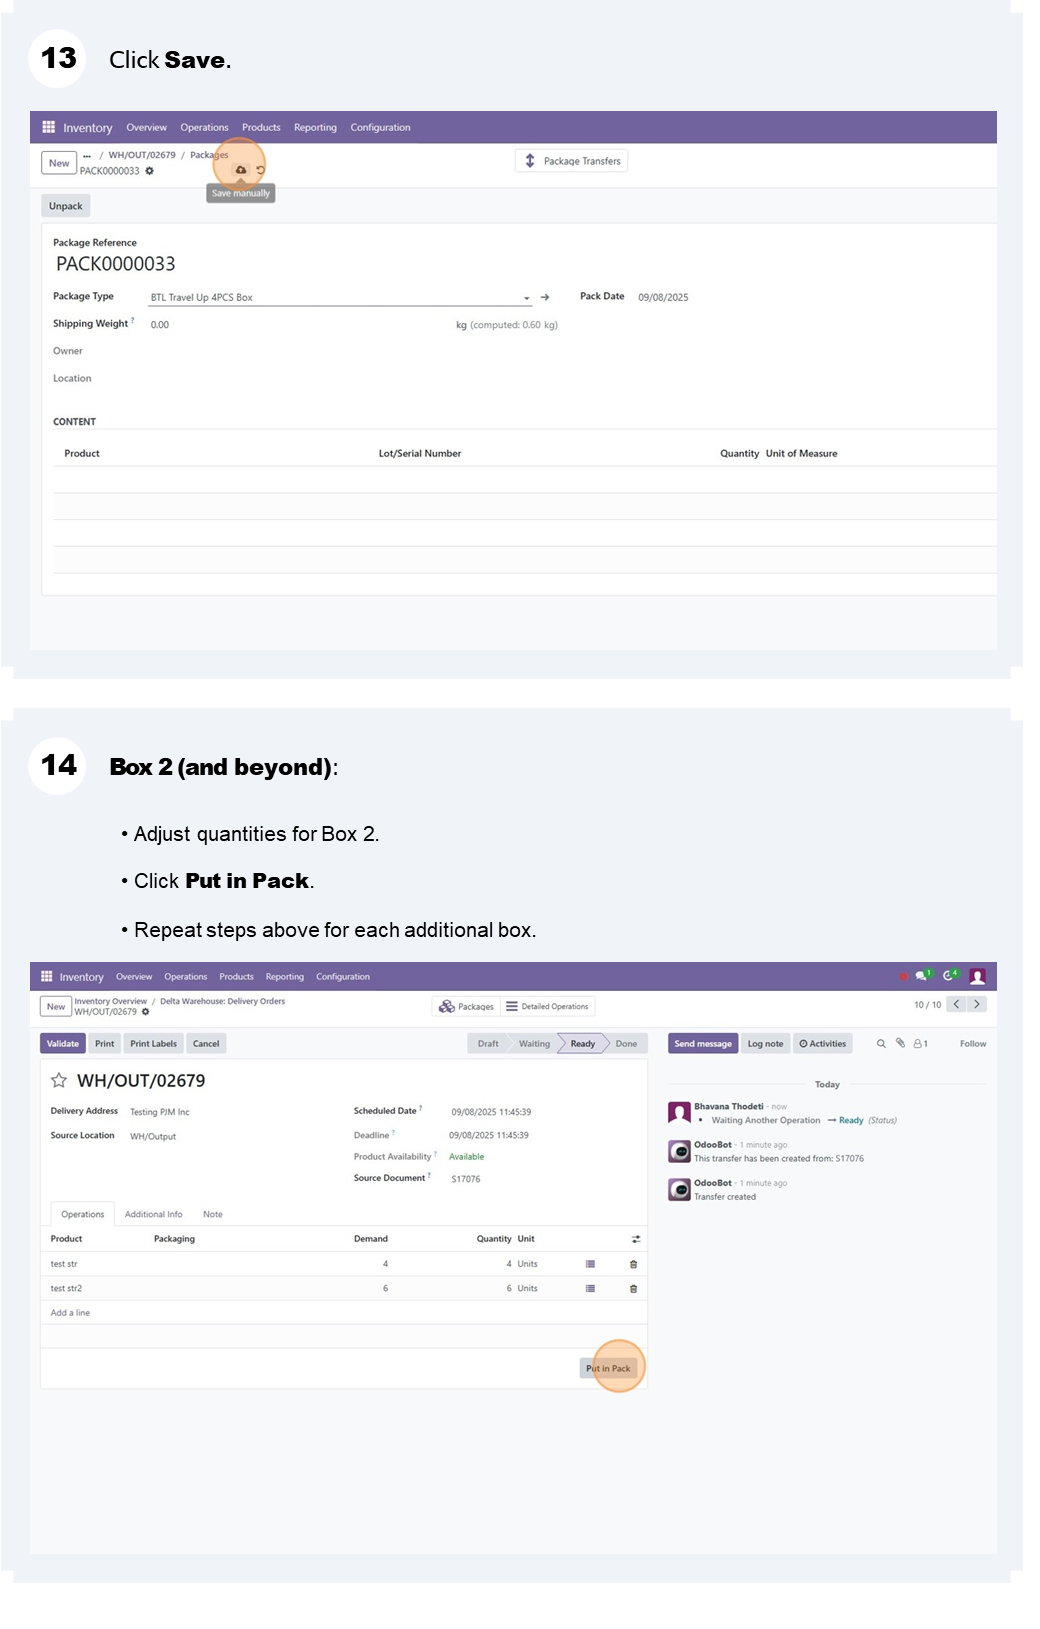
If PICK is Done, cancelling SO does not undo stock.
Stock remains in WH/Output until returned. (➡️
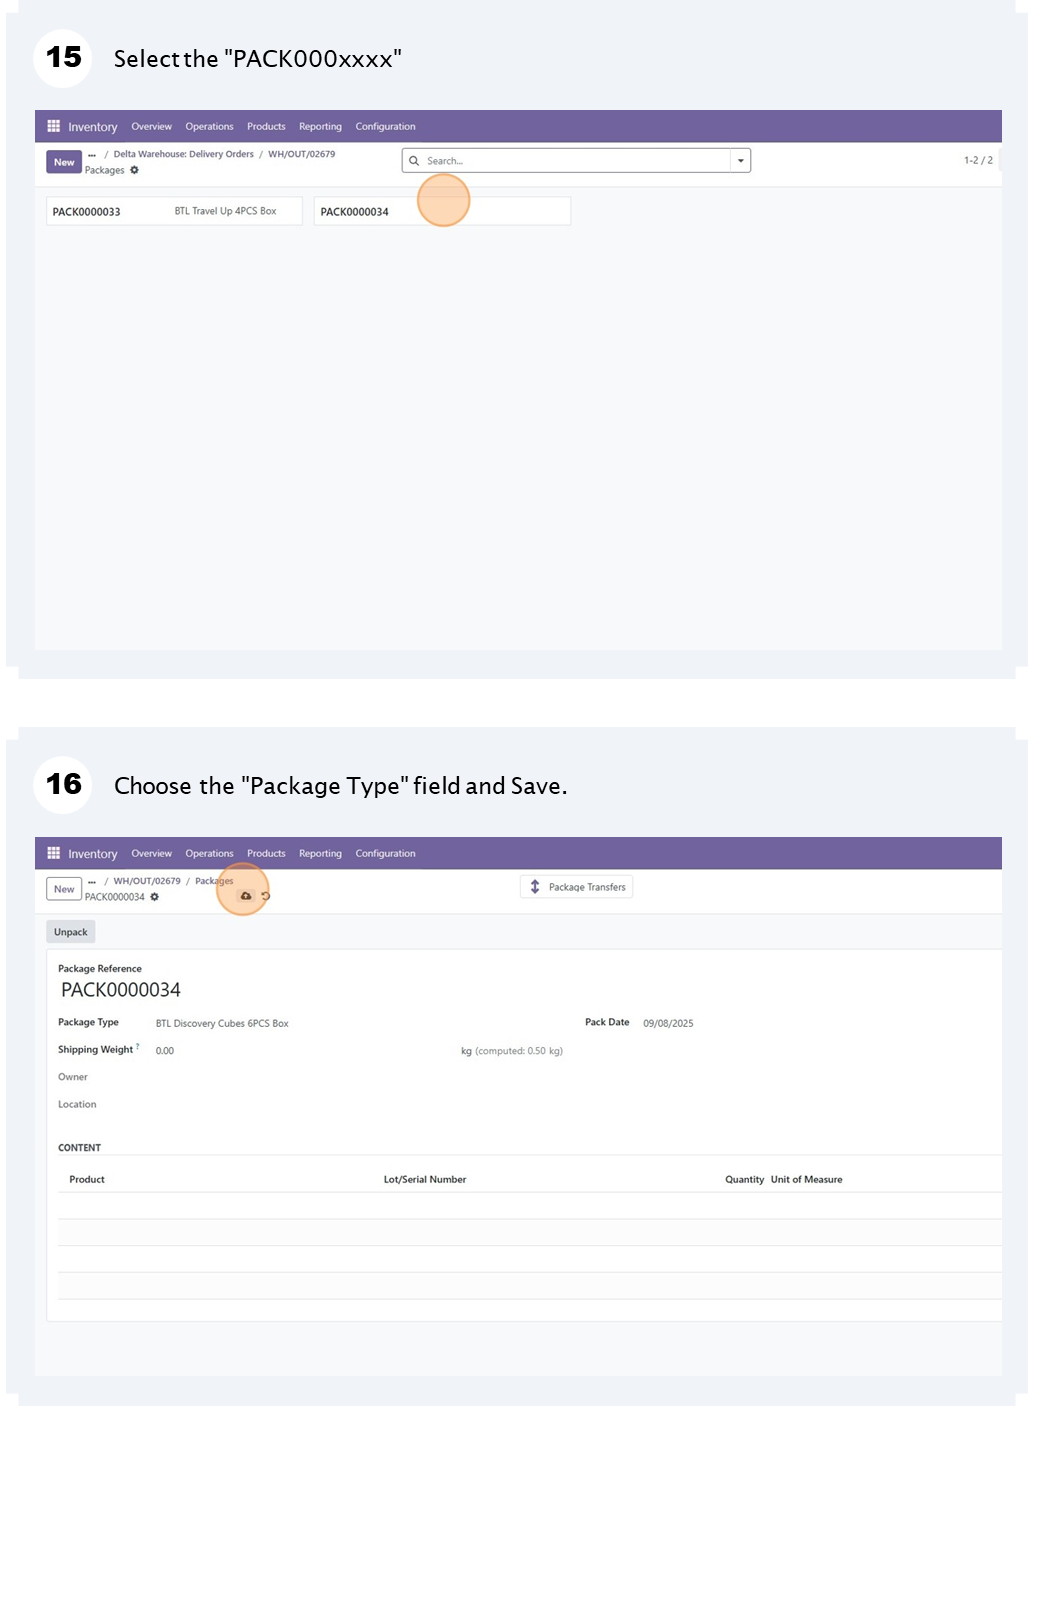
Follow the Manual Return Stock Flow Steps)
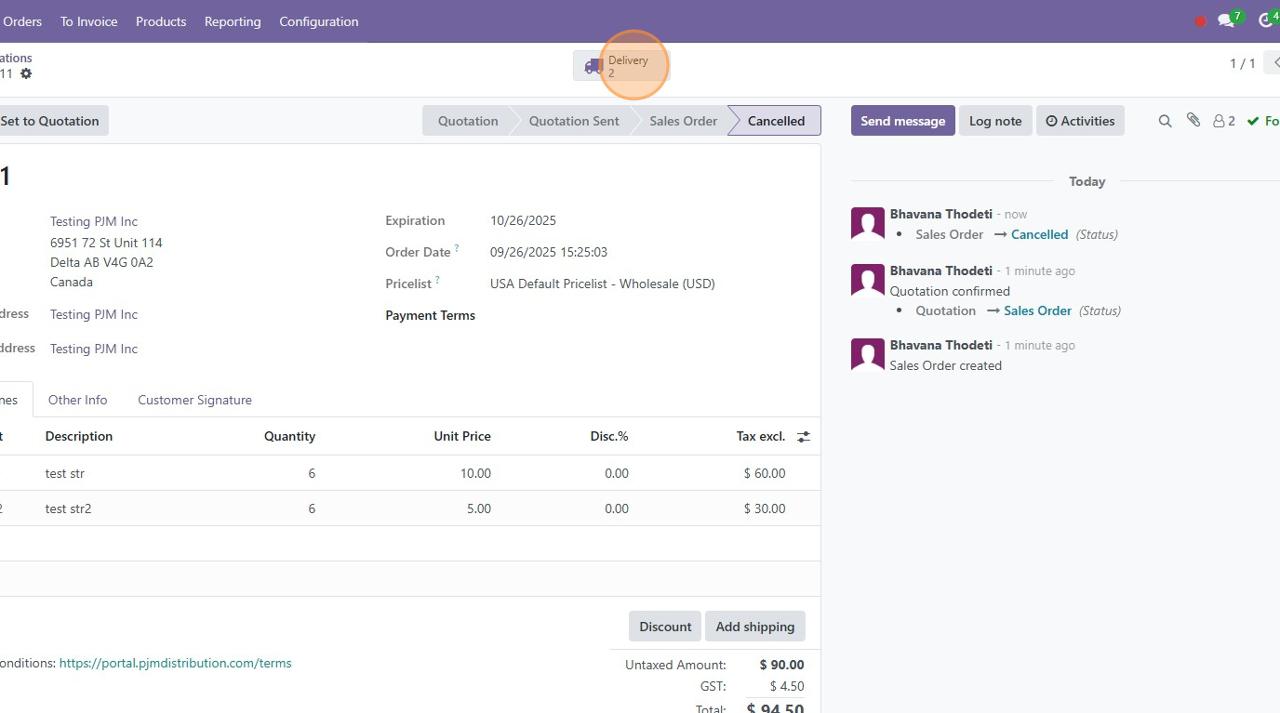
3. Cancel SO After OUT Validated
If OUT is Done, goods are considered delivered.
You must create a Return from OUT (customer return) to restock. (➡️
Follow the Manual Return Stock Flow Steps, but instead of PICK, select WH/OUT/xxx)
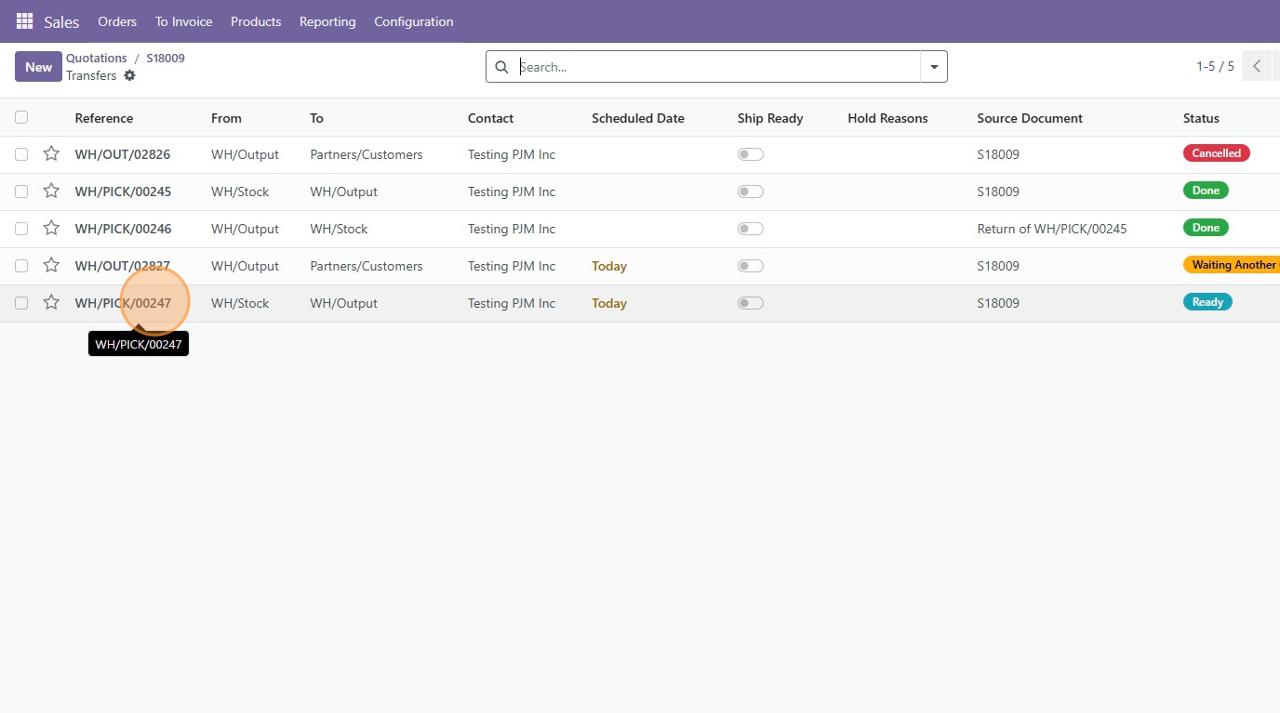
Cancel SO →
If PICK/OUT = Waiting → Both Cancelled
If PICK = Done → Manual Return from PICK
If OUT = Done → Manual Return from OUT
🛠 Manual Return Stock Flow
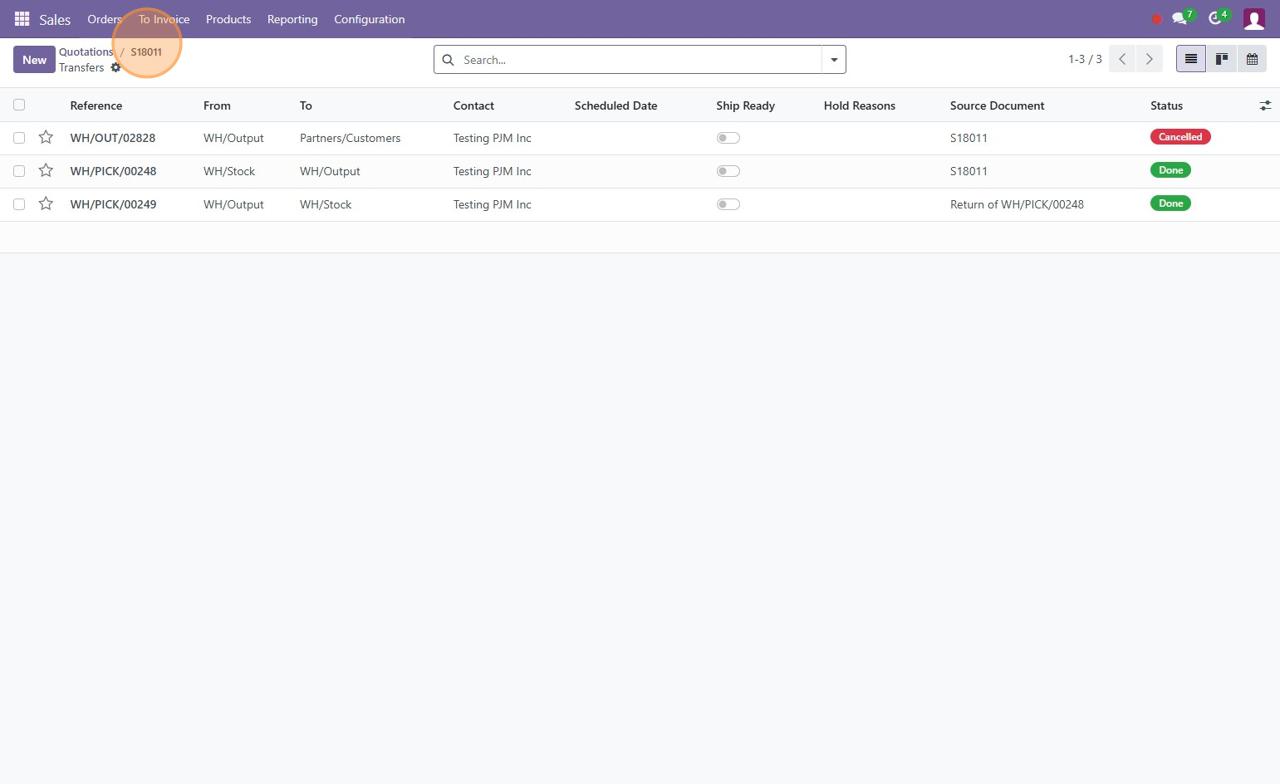
1. Locate the Done PICK
Open the cancelled SO → Transfers → open WH/PICK/xxx.

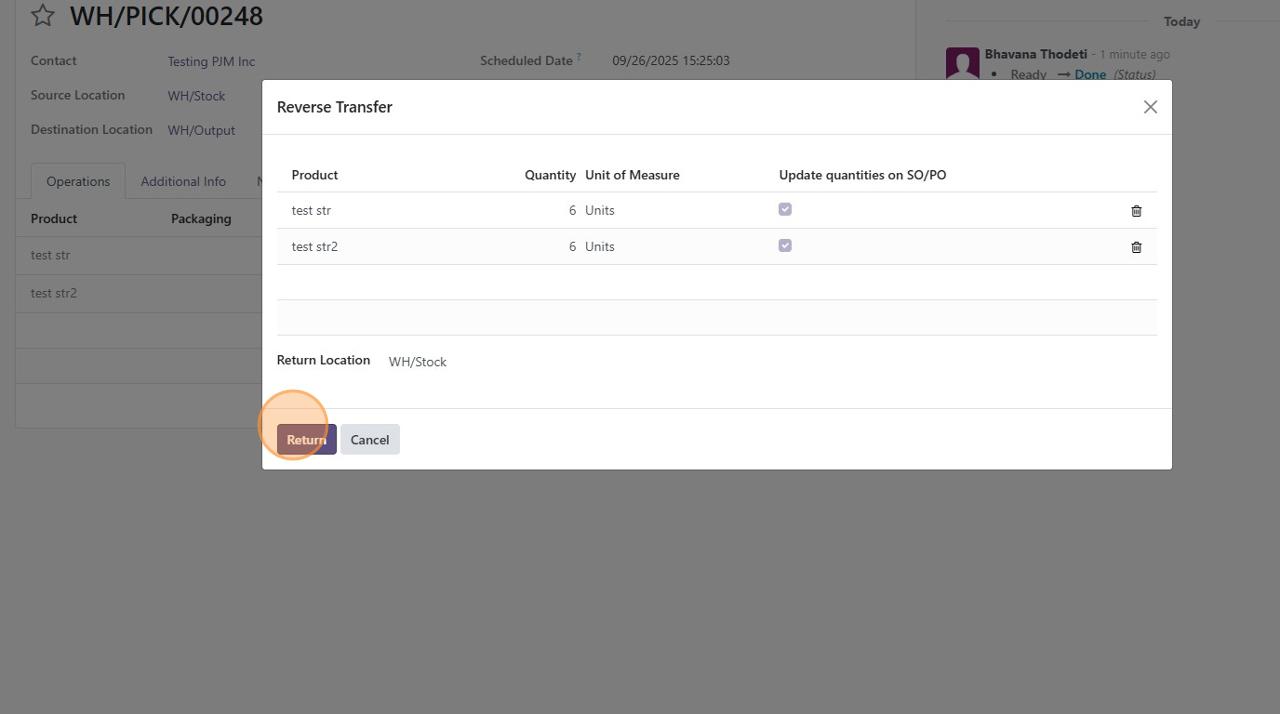
2. Click Return
On the PICK DO, click Return.
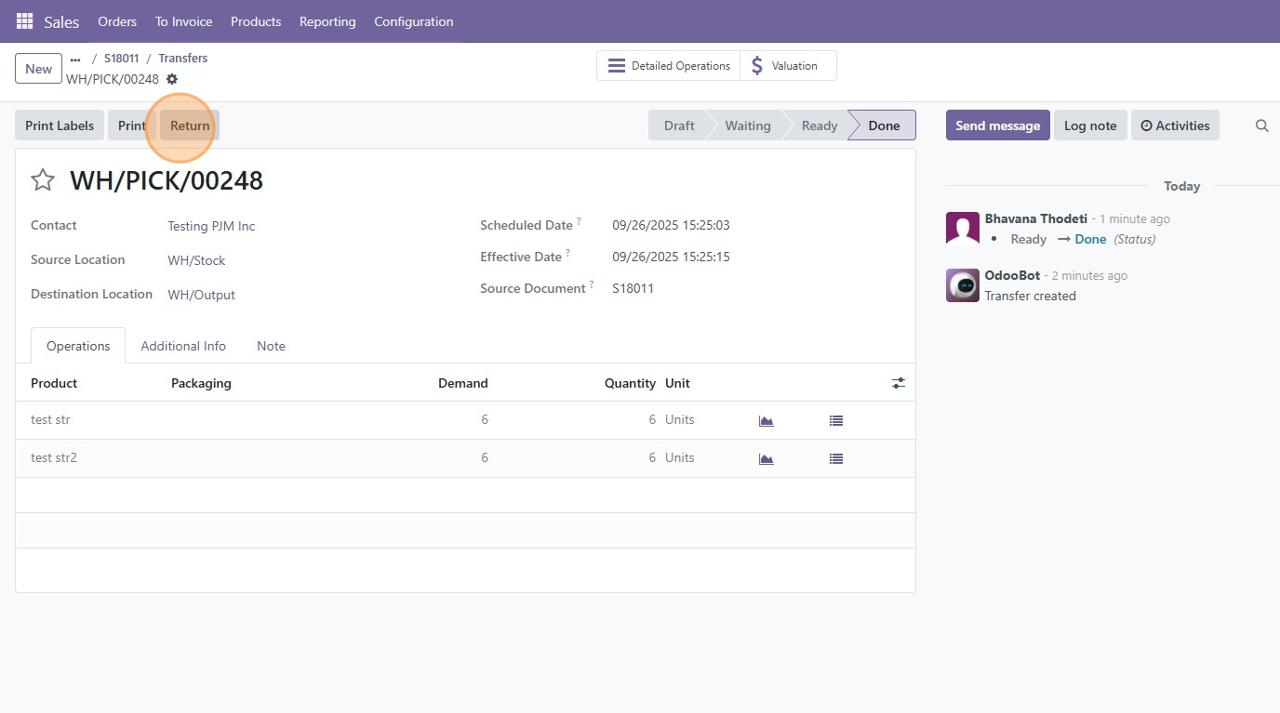
This opens the Return wizard. Confirm quantities to return.
Defaults usually match qty_done.
Confirm the return location and click 'Return'.
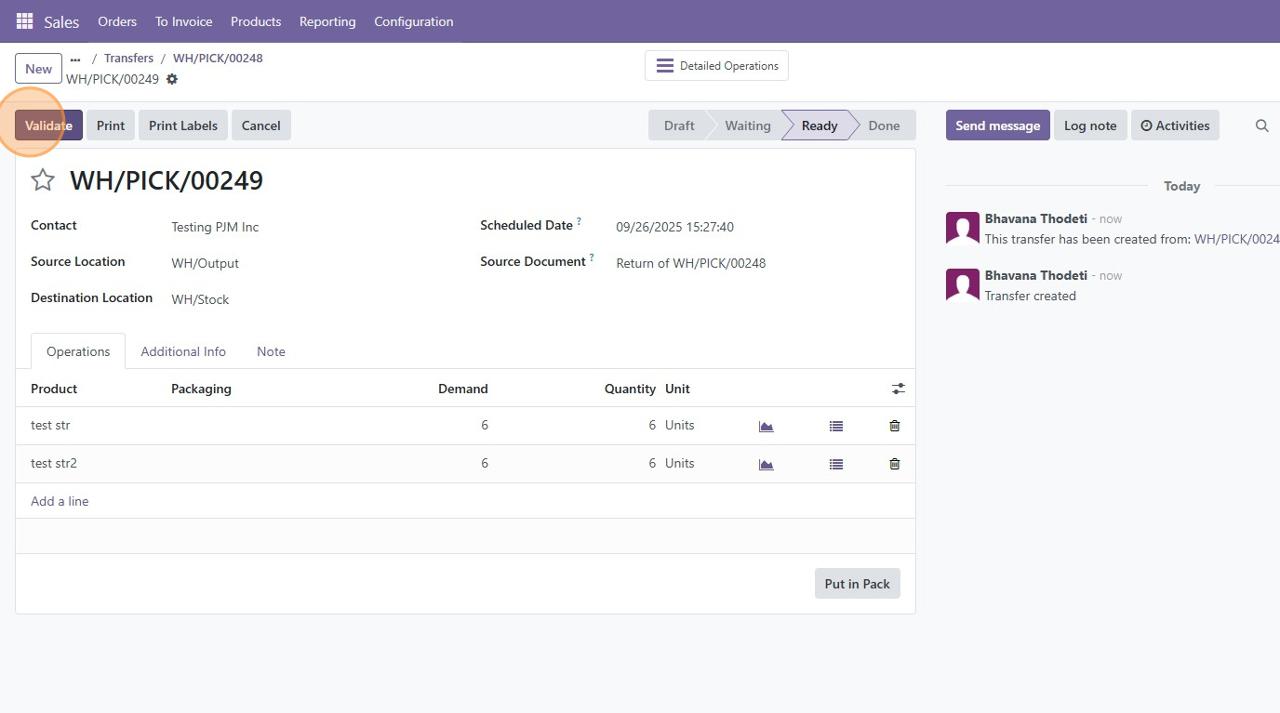
3. Validate Return DO
Wizard generates a new Return of WH/PICK/xxx transfer.
Destination is WH/Stock.
Click Validate.
Stock moves back into WH/Stock.
4. Verify Inventory (optional)
Check Product → Inventory tab.
On Hand should reflect returned quantities.
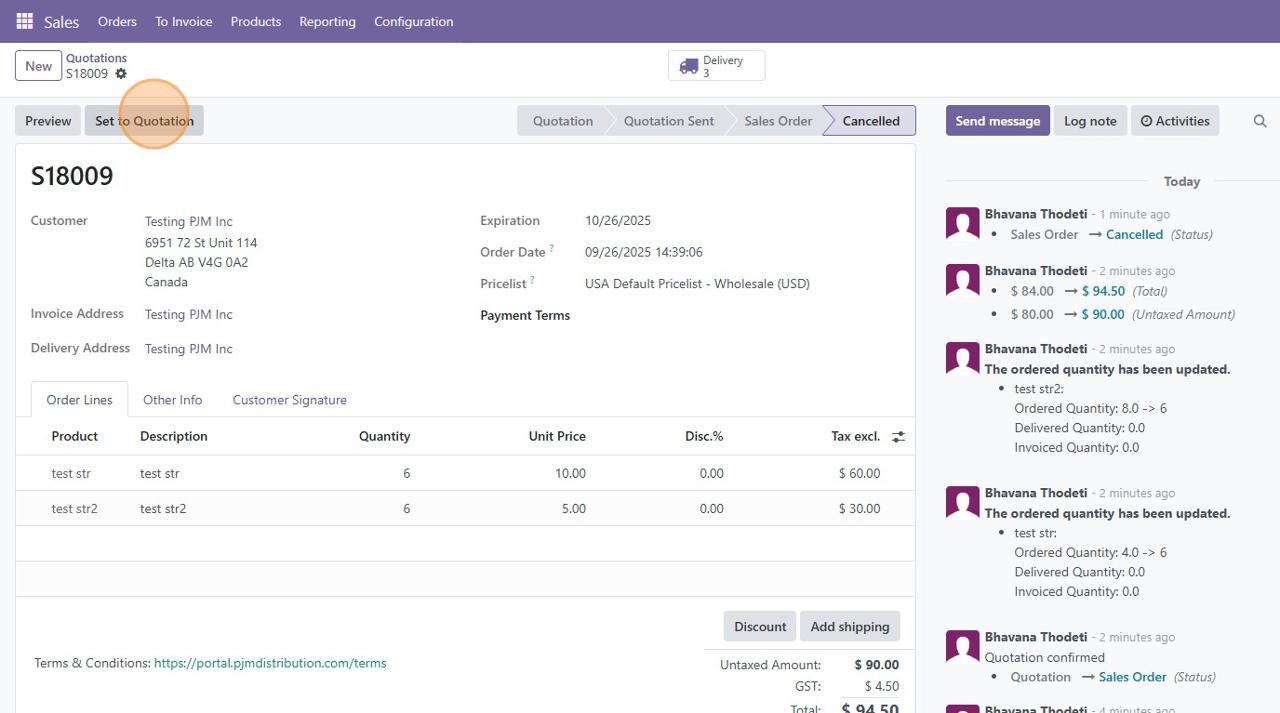
♻️ Re-Using Cancelled SOs
☑️ Set to Quotation
On the cancelled SO, click Set to Quotation if reusing it.
This reopens it for edits.
☑️ Confirm Again Carefully
Make adjustments, then confirm again.
⚠️ Only do this if returns are fully completed, otherwise stock will be over-reserved.
✅ Best Practices Summary
- Cancelling is safe before PICK validation; manual return needed after PICK is done.
- Always verify OUT vs PICK status before cancelling.
- Sales must notify Warehouse before cancelling if PICK has already been validated.
- Warehouse should pause validation if a cancellation request is pending.
- Manual returns must be validated to restore stock.
- Never reconfirm a cancelled SO until returns are completed.
✅ Operator Goal: Know when edits apply and when they don’t.
You included the ability to adjust quantities or add/remove products, with changes cascading to the Delivery Order
Suggestion: Clarify that this only works if the DO is not validated yet. Once the PICK is validated, edits won’t affect that transfer.
⚠️ Operators: Always check the status of the PICK before editing a confirmed SO.
1. Edit SO Before Validation
If changes are needed, you can edit product lines before PICK is validated.
Quantities and products will cascade down to Transfers.
2. Add/Remove Lines & Adjust Quantities Before PICK
Adding/removing lines & increasing/decreasing qty works only before PICK validation.
After PICK is done, the flow is frozen. Stock reservations will be updated accordingly.
3. After PICK Validation
⚠️ Once PICK is validated, changes in the SO will not affect stock.
The only correction method is through Returns (Manual Return Flow).
Manual Return Flow
4. Locate the Done PICK
Open the cancelled SO → Transfers → open WH/PICK/xxx.
5. Click Return
On the PICK DO, click Return.
This opens the Return wizard. Confirm quantities to return.
Defaults usually match qty_done.
Confirm the return location and click 'Return'.
6. Creates & Validate Return DO
Wizard generates a new Return of WH/PICK/xxx transfer.
Destination is WH/Stock.
Click Validate.
Stock moves back into WH/Stock.
7. Verify Inventory (optional)
Check Product → Inventory tab.
On Hand should reflect returned quantities.
♻️ Re-Using Cancelled SOs
☑️ Set to Quotation
On the cancelled SO, click Set to Quotation if reusing it.
This reopens it for edits.
9. Confirm Again Carefully
Make adjustments, then confirm again.
⚠️ Only do this if returns are fully completed, otherwise stock will be over-reserved.
✅ Best Practices Summary
- Always check PICK status before editing.
- Make changes only before PICK is validated.
- Notify Warehouse to pause PICK if edits are pending.
- Use Manual Return Flow if PICK is already validated.
- Validate Return DOs to restore stock correctly.
- Reconfirm SO only after returns are fully completed.
✅ Operator Goal: Understand how to create, confirm, and flow through PICK ➜ OUT.
Suggestion: Add a note that confirmation locks in reserved stock. Staff should double-check product lines before confirming, especially during peak order volume.
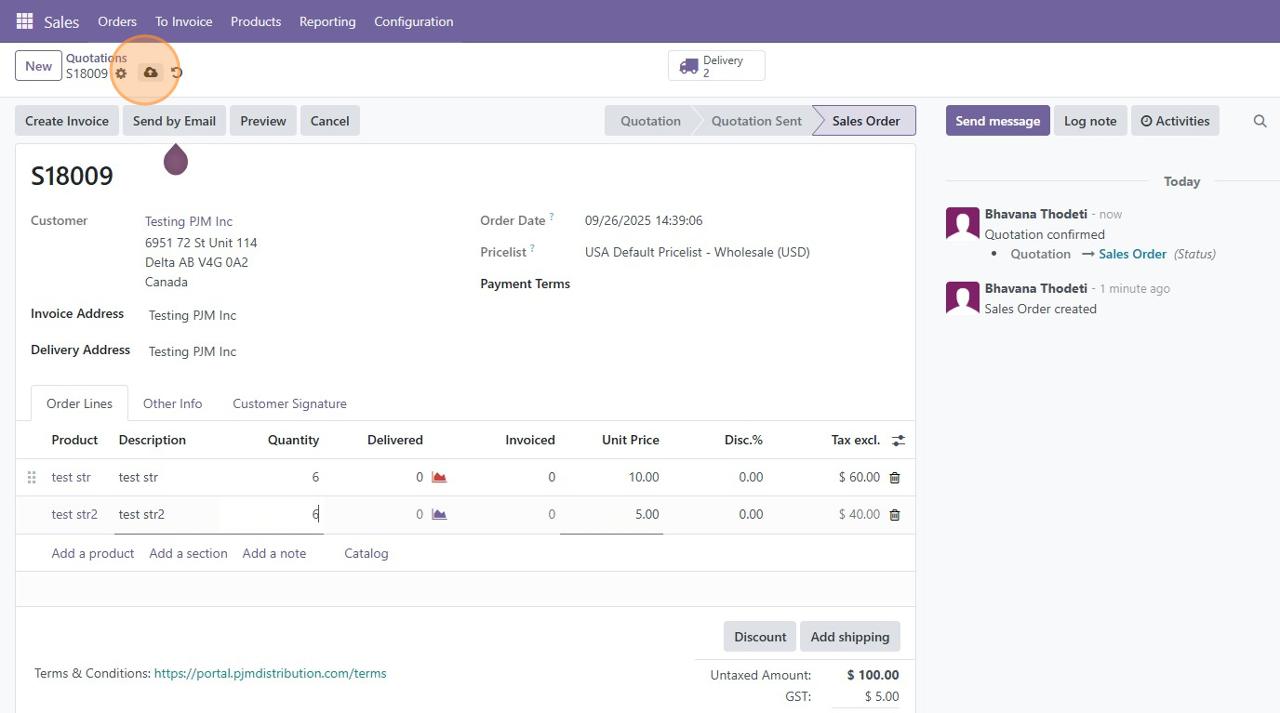
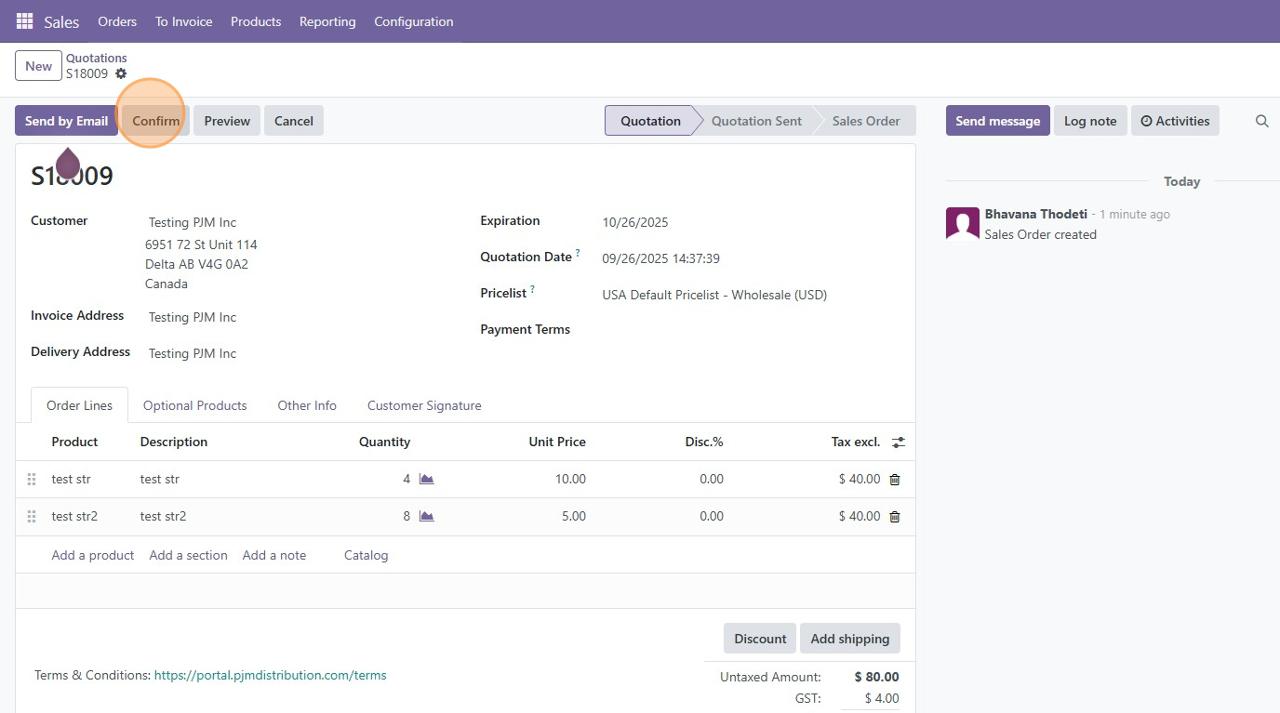
1. Create Sales Order (SO)
Go to Sales → Orders → Create and enter customer + products.
This is the starting point of every flow.
2. Add Order Lines
Fill in products, quantities, prices, taxes, and discounts.
Check carefully before saving.
3. Save Draft
The order is now in Quotation state.
No stock is reserved yet.
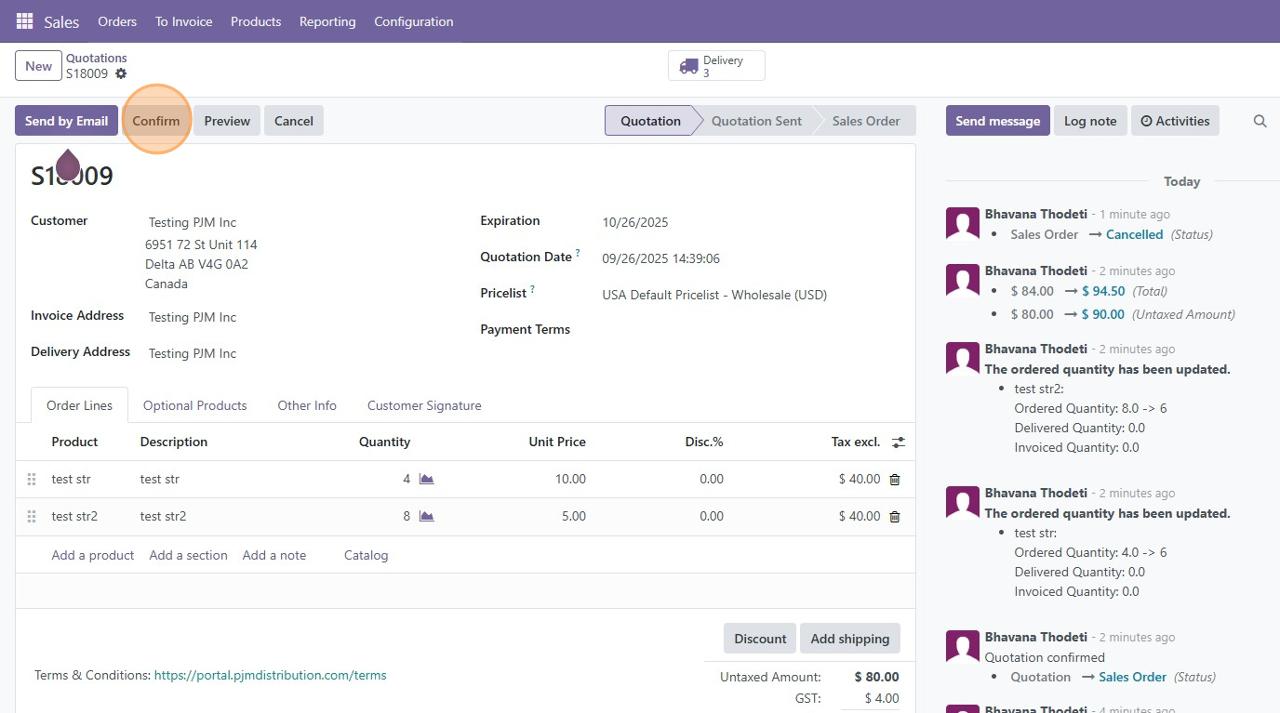
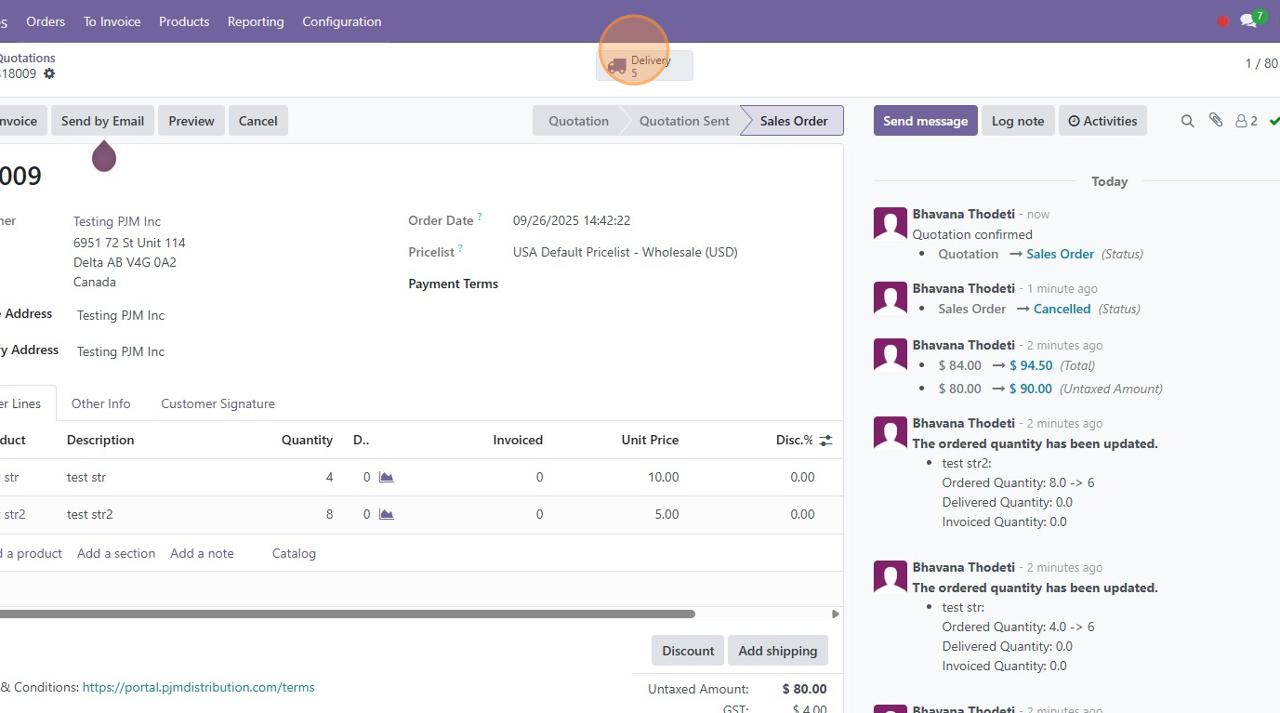
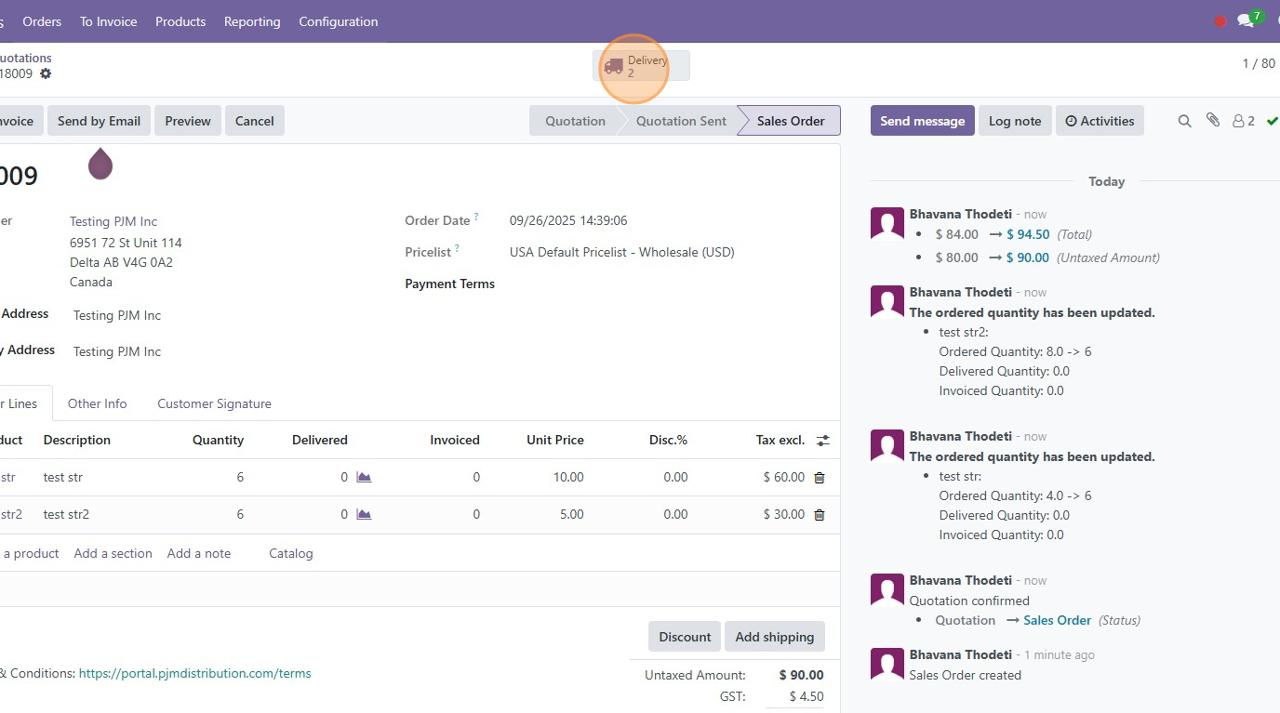
4. Confirm Sales Order
Click Confirm.
This generates Transfers (PICK + OUT in 2-step delivery).
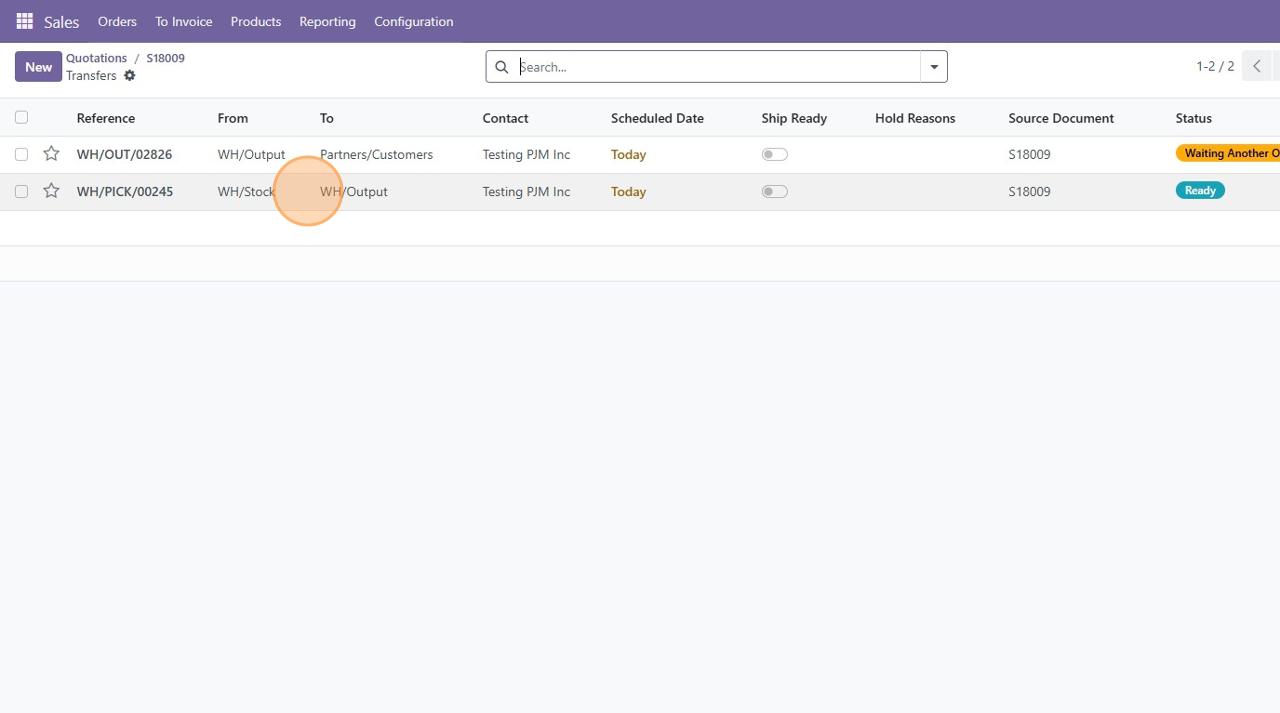
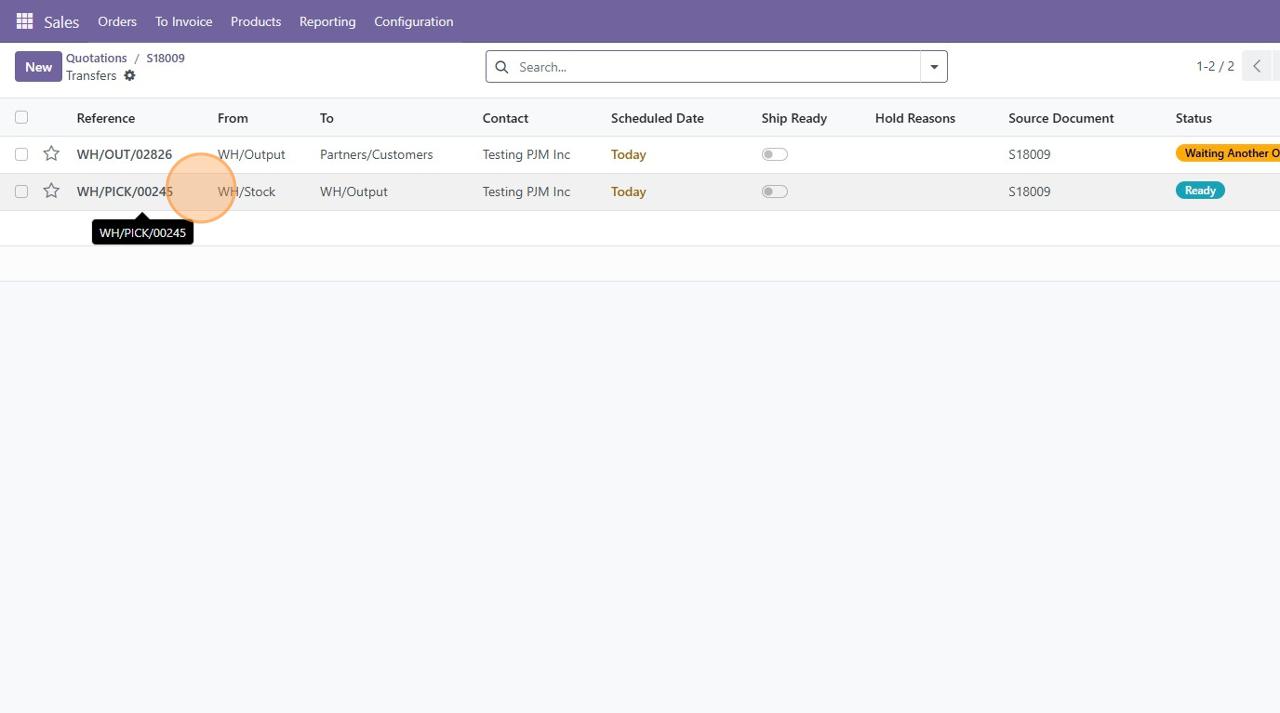
5. Review Generated Transfers
Go to the Delivery smart button on the SO.
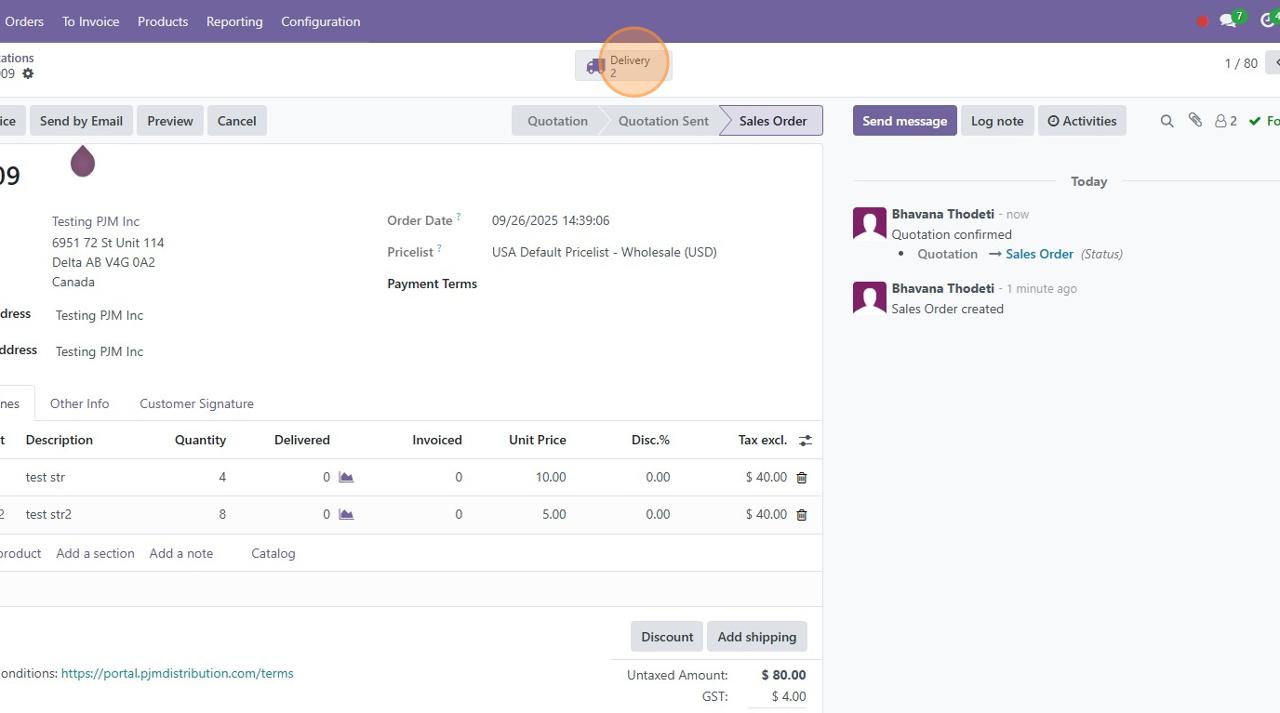
Two records will show: PICK (Internal Transfer) and OUT (Customer Delivery).

6. Understand PICK vs OUT
- PICK (WH/PICK/xxx): Moves stock from WH/Stock → WH/Output.

- OUT (WH/OUT/xxx): Ships stock from WH/Output → Customer.
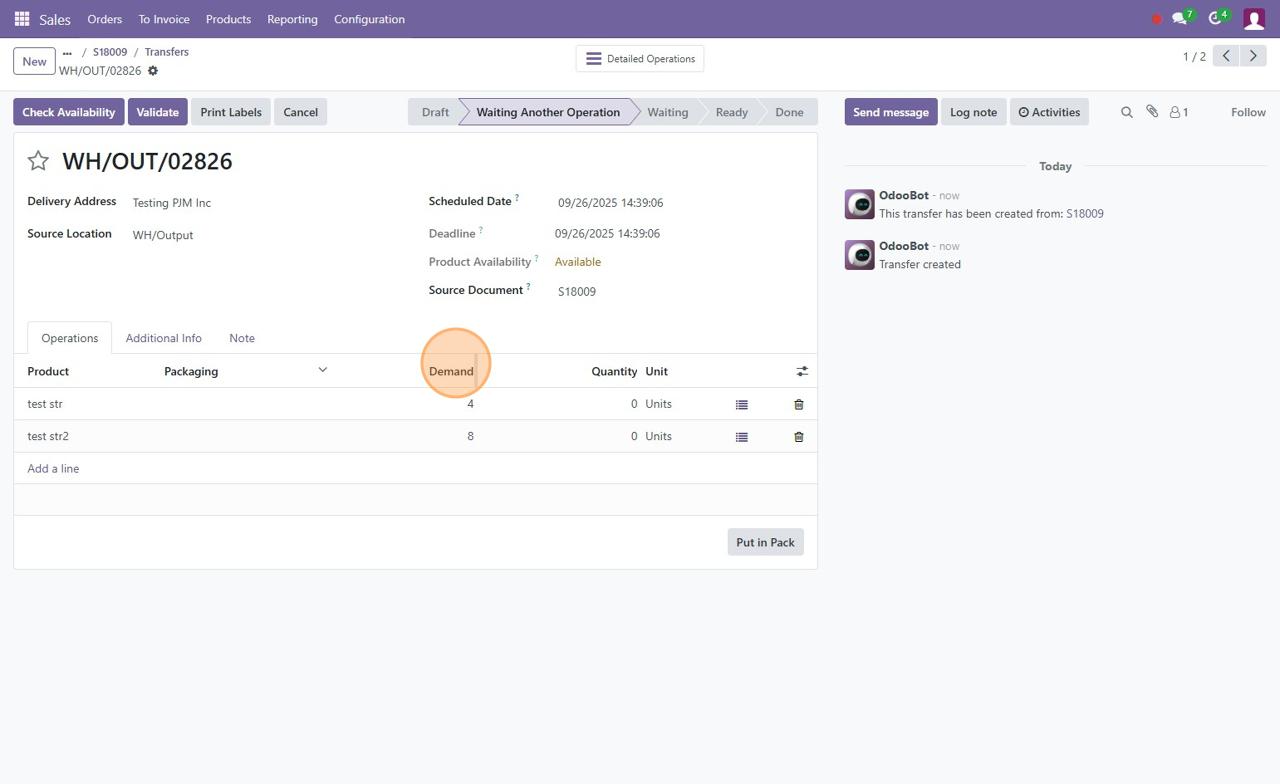
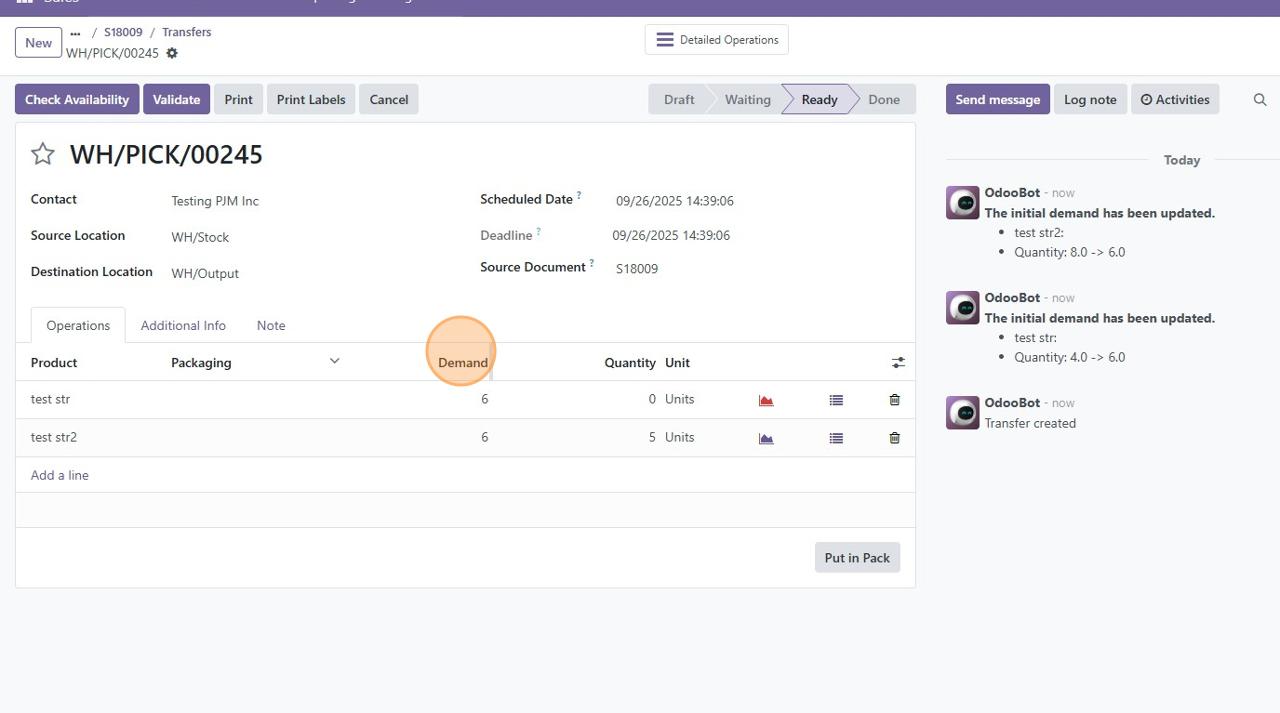
7. Reserve Stock
When the SO is confirmed, Odoo reserves stock automatically (if available).
Reserved stock is visible on the PICK.
Demand → This is the quantity requested by the SO.
Quantity → This shows how many units are actually reserved from stock.
✅ Operator Action:
If the reserved quantity is less than the demand, click Check Availability.
- This tells Odoo to allocate whatever stock is available in the warehouse.
- If full stock exists, the Quantity column will match the Demand.
- If not, the system will partially reserve what’s available, and you’ll need to wait for replenishment or adjust.
8. Warehouse Confirms PICK
The warehouse operator confirms PICK is ready.
This is the pivot step — once validated, stock physically leaves WH/Stock.
9. Validate PICK
Click Validate on the PICK DO.
This decreases stock from WH/Stock and increases WH/Output.
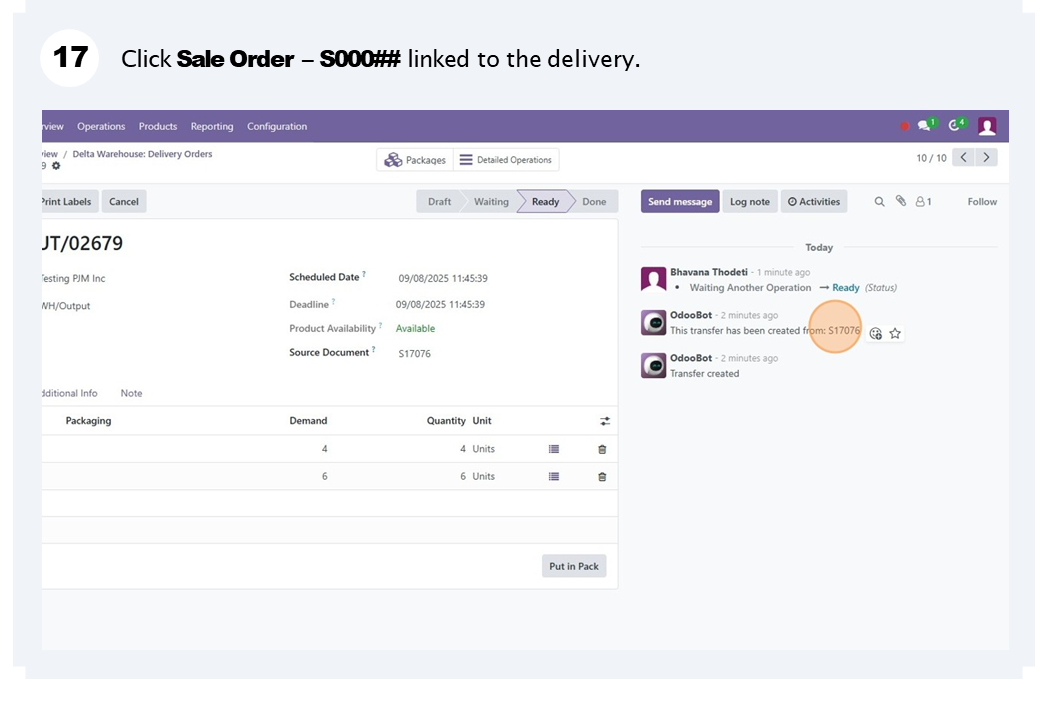
10. Check OUT Order
Once PICK is validated, Payments and carrier information are confirmed, and then OUT DO can now be validated by shipping staff.
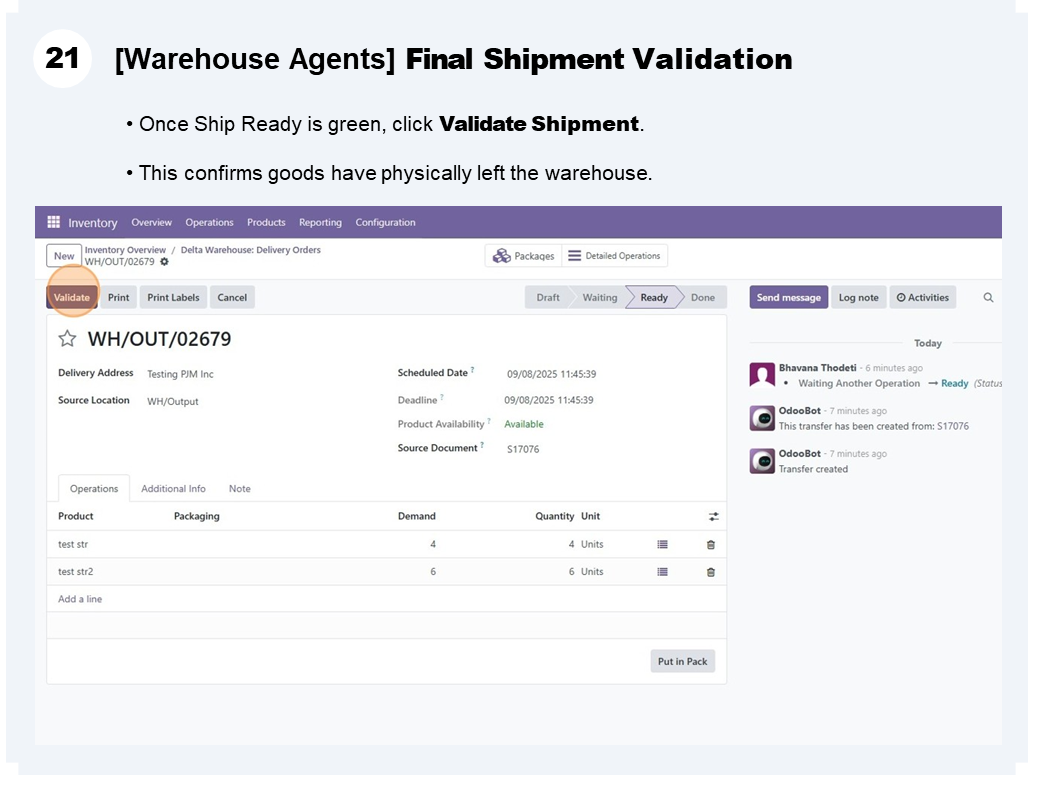
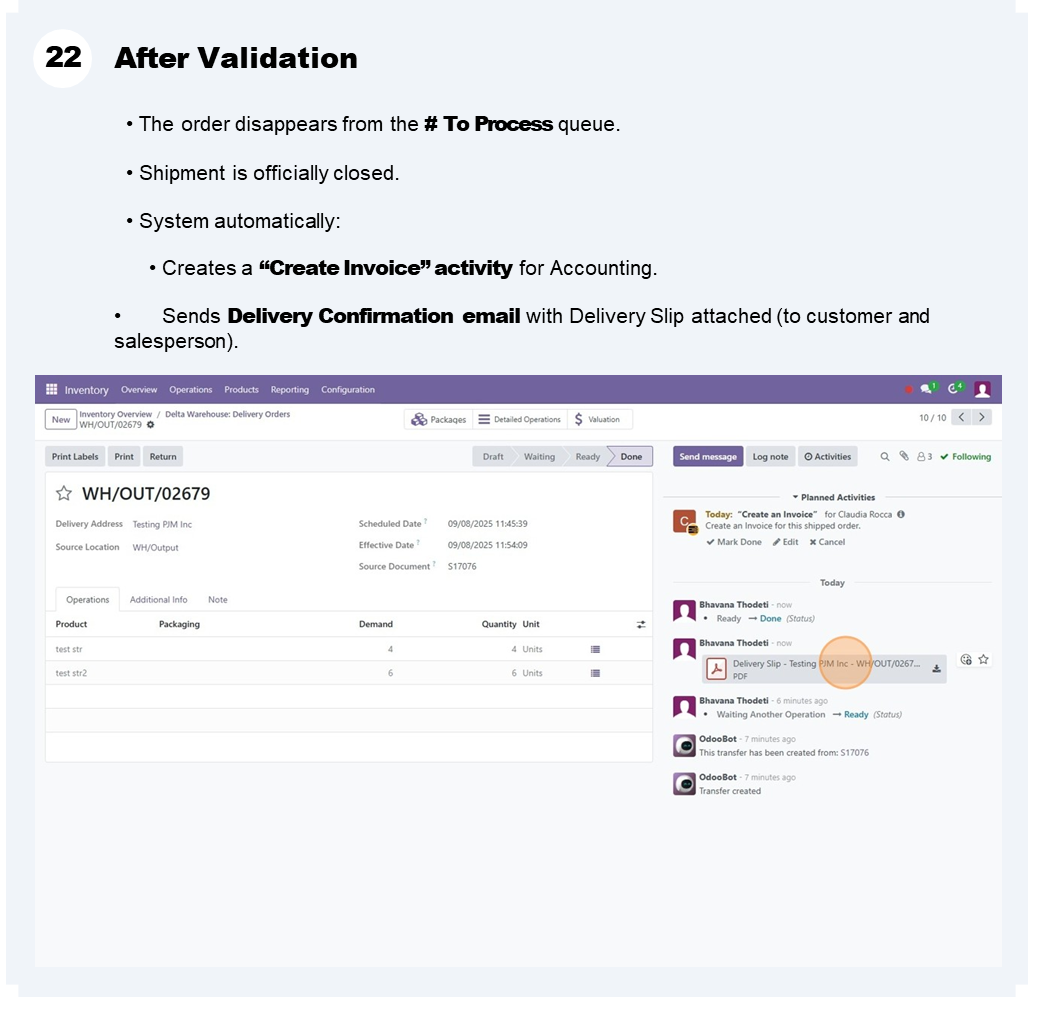
11. Validate OUT (Delivery to Customer)
Click Validate on the OUT DO.
This decreases WH/Output and finalizes delivery to the customer.
✅ Best Practices Summary
- Always double-check order lines before confirming.
- Remember: confirmation locks and reserves stock immediately.
- Review both generated transfers (PICK & OUT) after confirmation.
- Understand the flow: PICK = Stock → Output, OUT = Output → Customer.
- Validate PICK only when the stock is physically ready to move.
- Treat PICK validation as the pivot point — after this, stock is committed.
🎯 Course Objective
Internal Transfers allow you to move stock between warehouses (e.g., Delta → North Carolina, or CanAmer → Delta,...). This ensures stock is available at the correct warehouse before fulfilling customer orders.
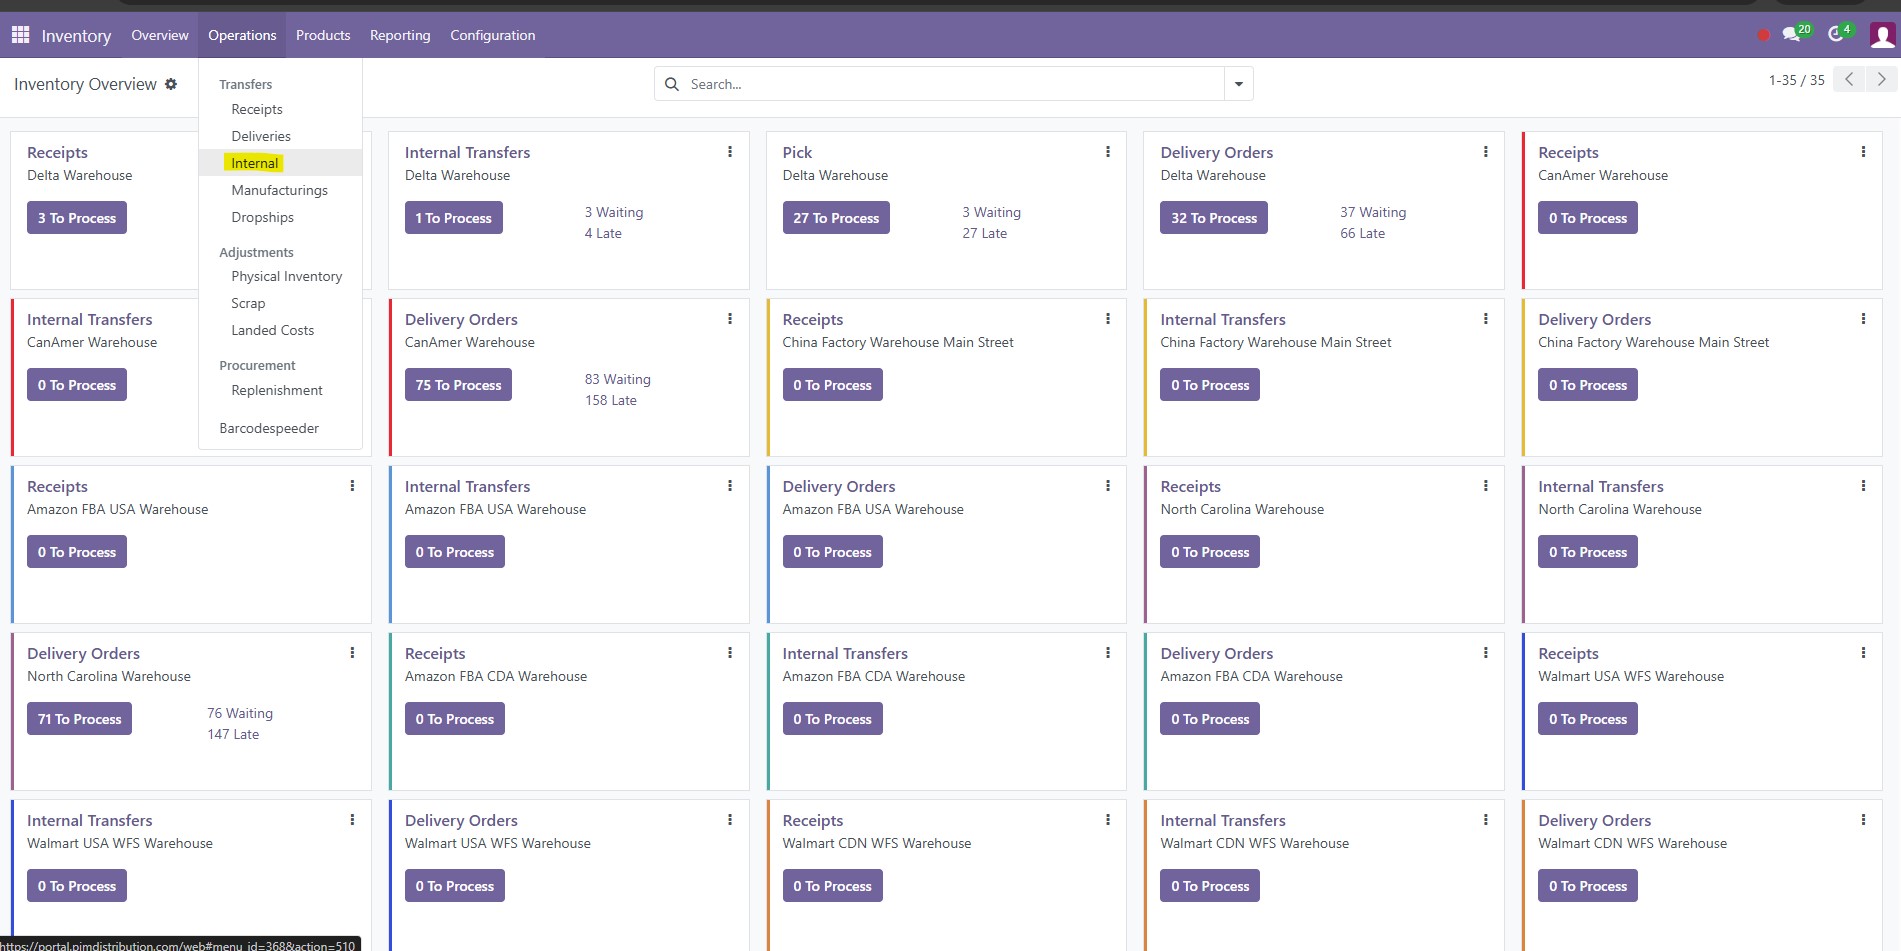
📍 Go to Inventory → Operations → Internal
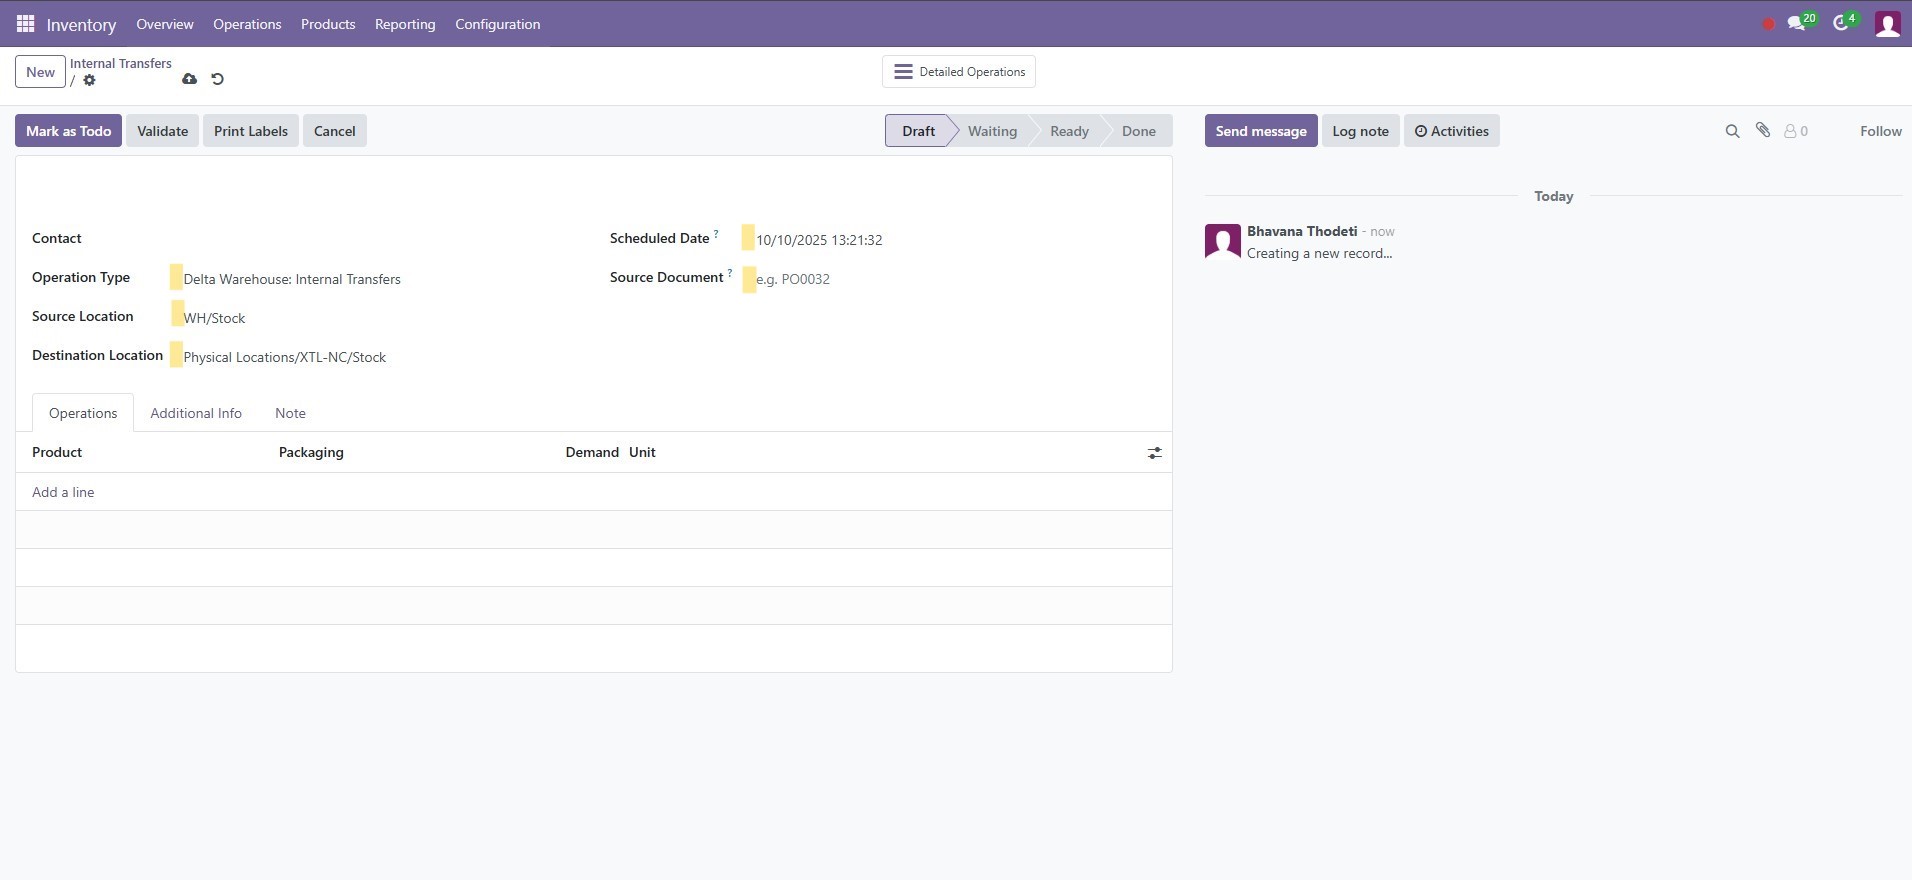
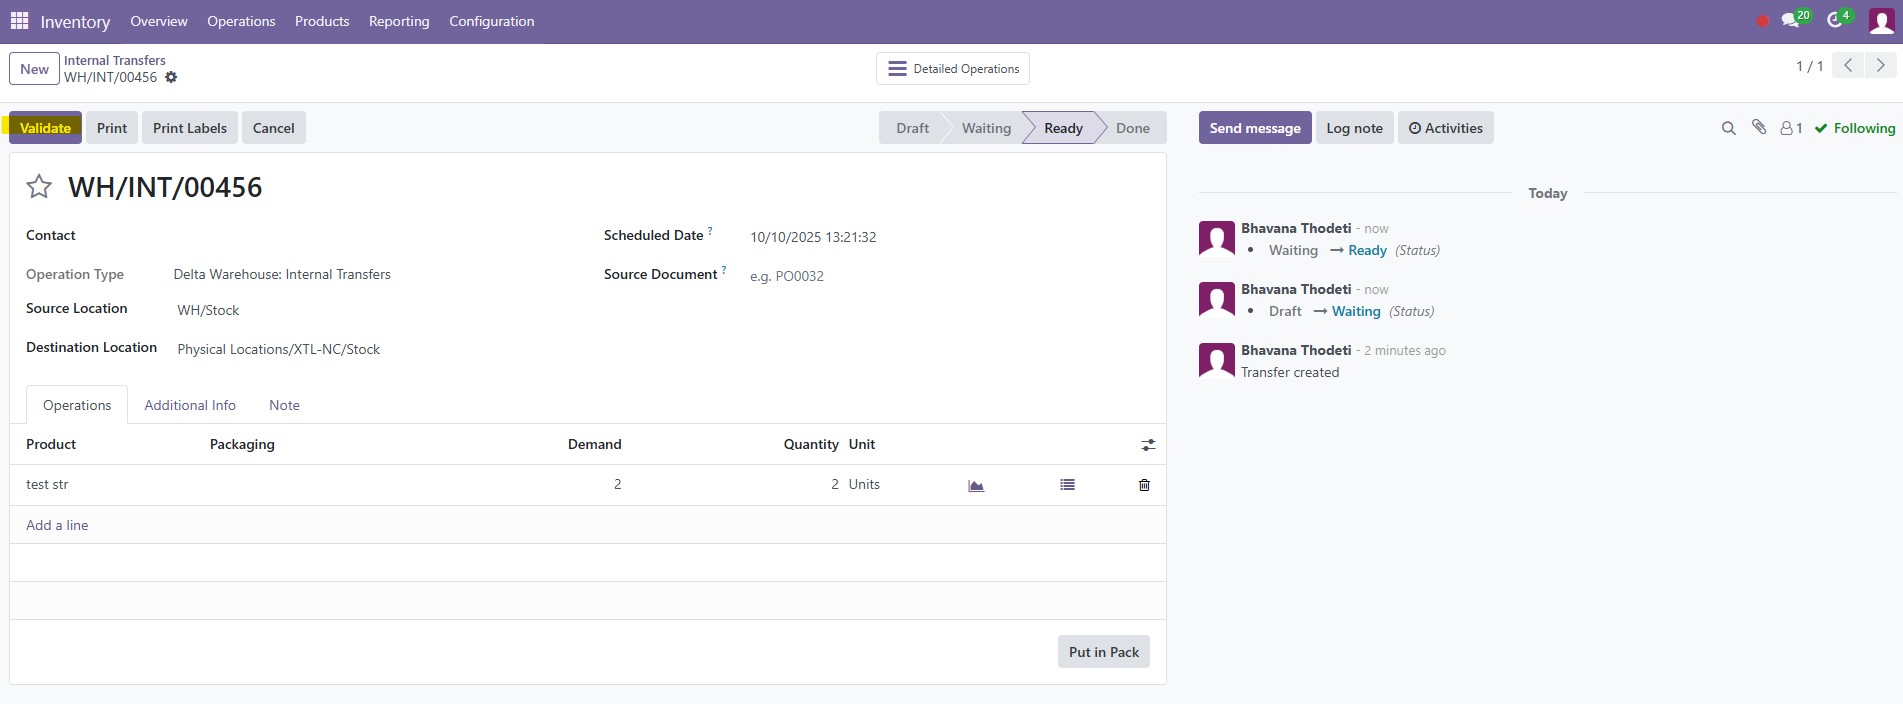
🔹Create Transfer
Click New in the top left.
You’ll see the Internal Transfers Form like this:
Warehouse Transfer Process – Delta → North Carolina
| Field | What to Enter | Notes |
|---|---|---|
| Contact | Leave blank (optional) | Internal transfer doesn’t need a contact. |
| Operation Type | Delta Warehouse: Internal Transfers | Confirm this matches the Delta warehouse’s internal operation. |
| Source Location | Delta / Stock (WH/Stock) | Click the dropdown if needed and select the Stock location under Delta. |
| Destination Location | North Carolina / Stock (Physical Locations/XTL-NC/Stock) | Must point to the receiving warehouse’s Stock location. |
| Scheduled Date | Today’s date (or planned shipment date) | Helps track internal logistics. |
| Source Document |
Related Sales Order # (e.g., SO####)
| Optional but recommended for traceability. |
Example: CanAmer → Delta
Select Operation Type: CanAmer Warehouse: Internal Transfers,
Source Location: CanAmer / Stock (Physical Locations/XTL-CANAM/Stock)
Destination Location: Delta / Stock (WH/Stock)
🔹 Add Products
Under the Operations tab:
- Click Add a line.
- Choose the product(s) to move.
-
Enter:
- Product → Select SKU (same as Sales Order line).
- Demand Quantity → Qty to transfer.
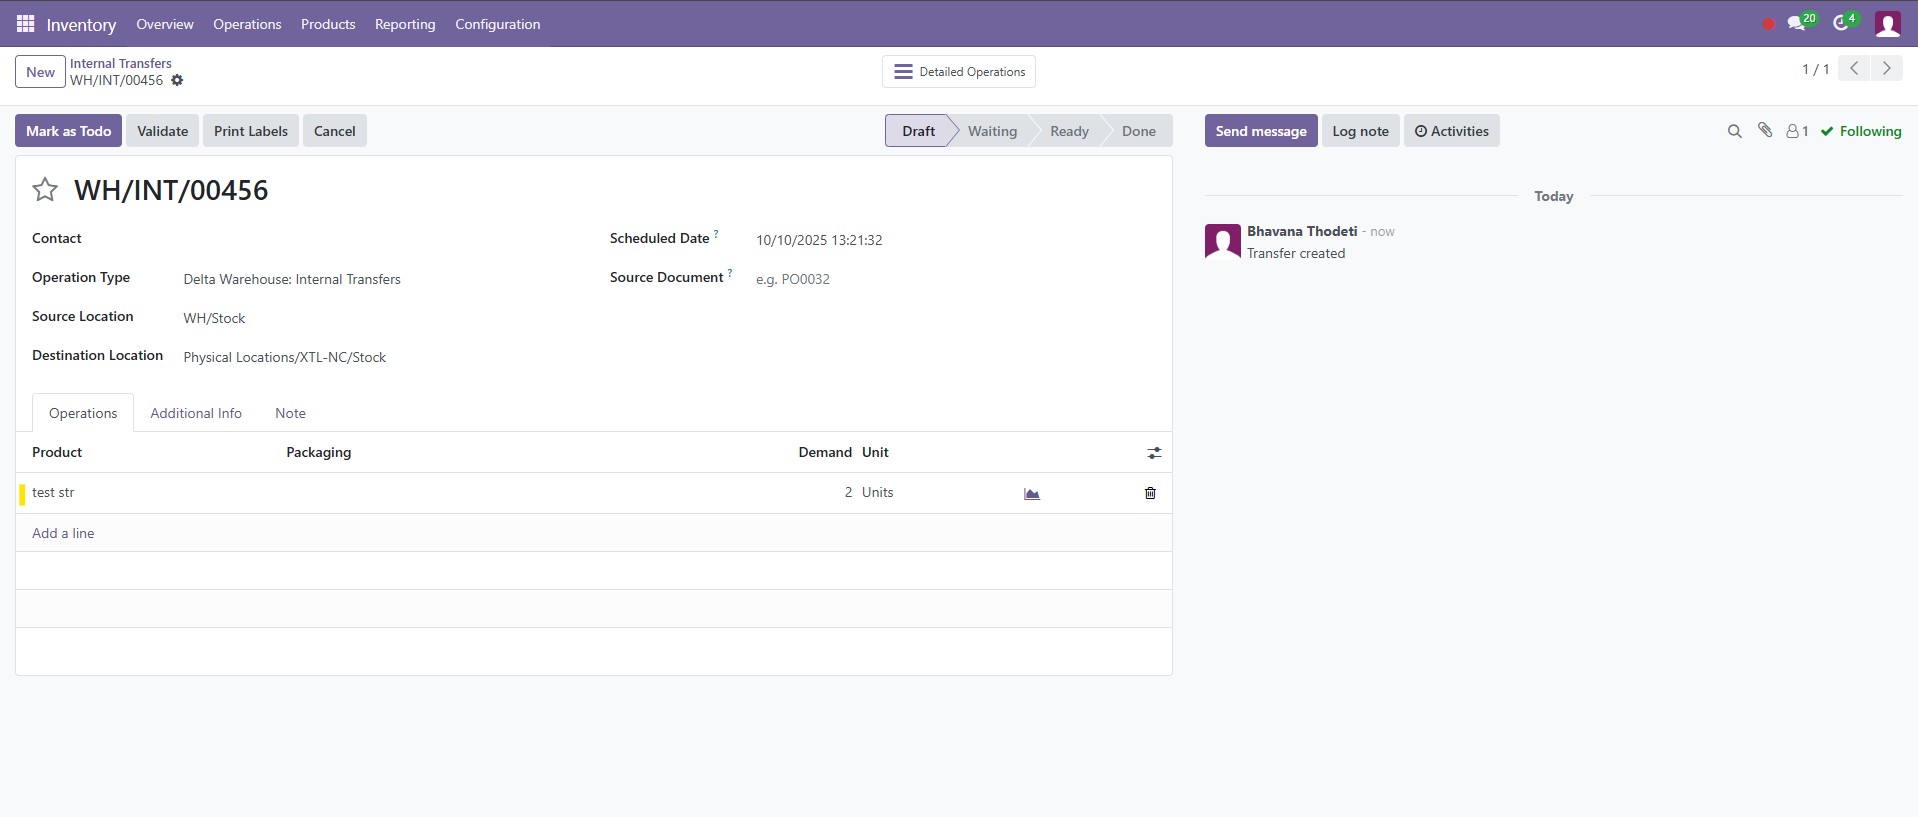
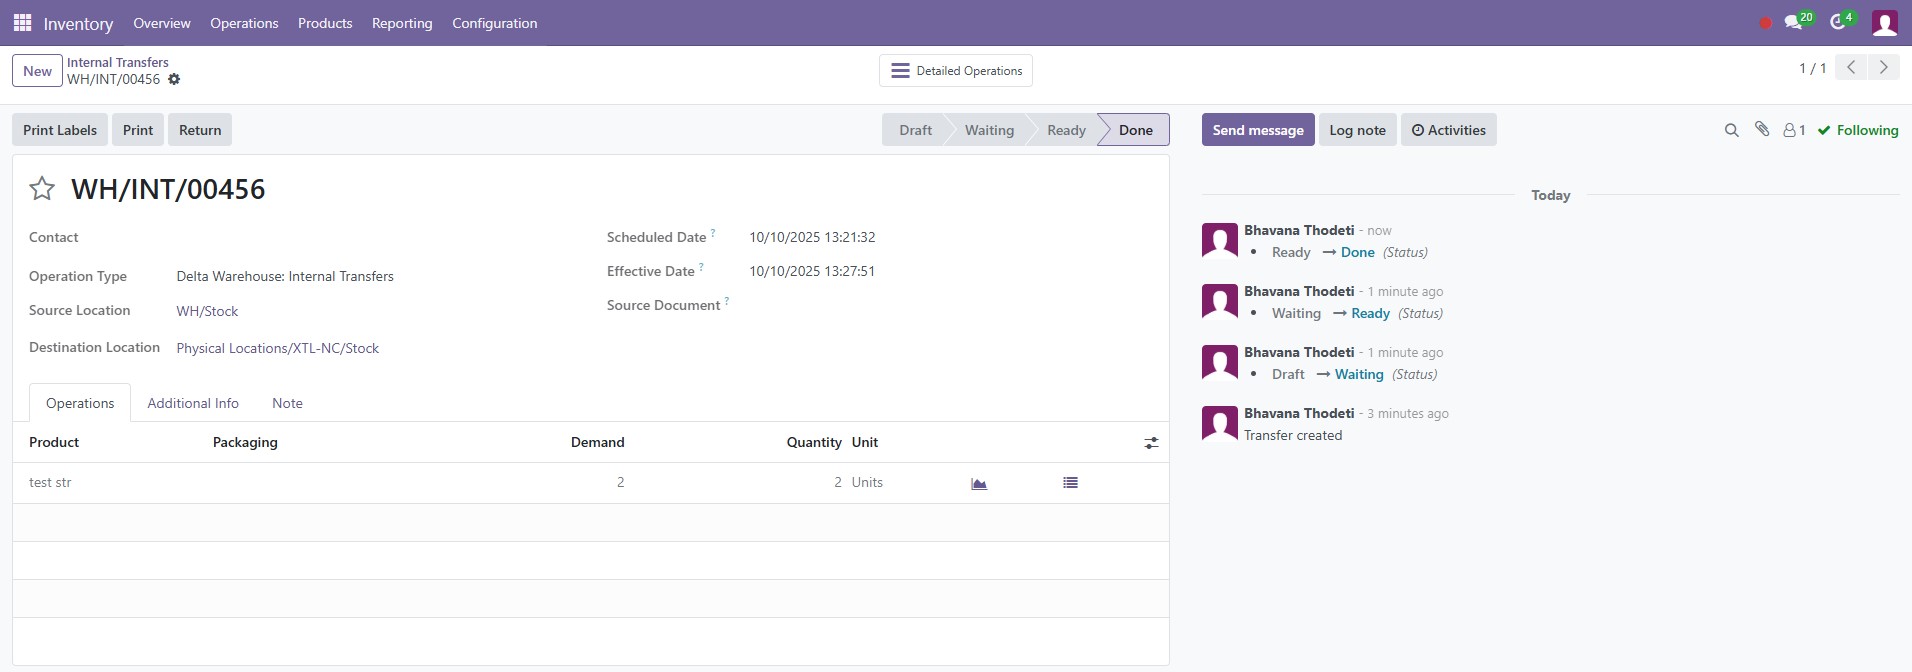
🔹 Confirm and Validate
1. Click Mark as To Do
→ This sets the transfer as ready.
2. Warehouse team action (pick, pack & ship):
- Pick the items in Source (Delta),
- When shipped, click Validate
3. On Validate
→ Confirms the movement and instantly updates stock:
- Delta → decreases stock.
- North Carolina → increases stock.
🔹 Verify Movement
📍
Go to Inventory → Reporting → Locations
Filter by:
- Warehouse: North Carolina
- Product: [product name]

✅ You should see the transferred stock quantity reflected in NC.